Create Word Document for Label Printing using Excel Data
For printing labels, Microsoft Word is used to create a template for labels with data read from an Excel document as the data source of the label template. Though as the data for the Word document can be the Microsoft Outlook Contacts data as far as I could see in general contact information including address data for printing labels is read from an Excel document. In this Office tutorial, I want to share Office users how they can prepare print labels using Word and Excel.
First of all, I want to share below Excel document which includes imaginary people and imaginary address data to print using the label template we will create in following steps in this tutorial.
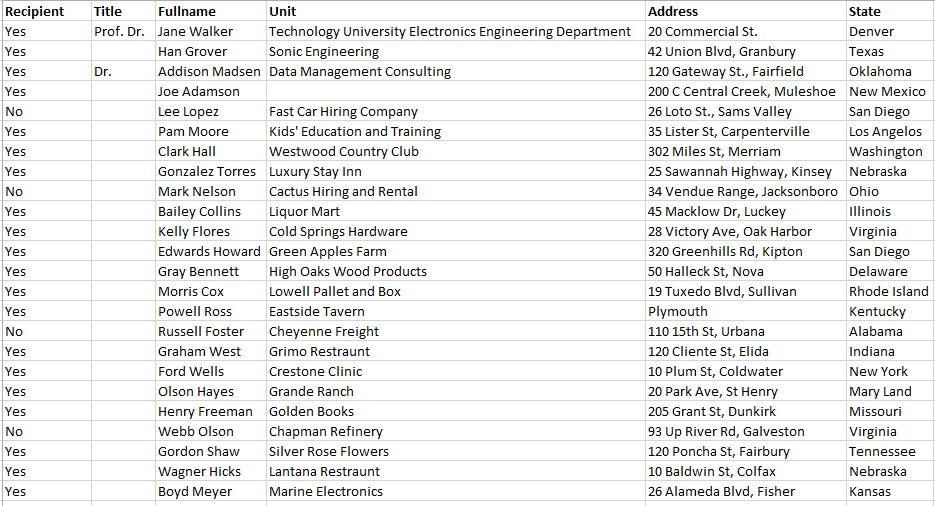
As seen above, the Excel data has a column named "recipient" that helps us to decide or filter which data rows to print on labels as a recipient.
In short we will not print address rows with "No" in "Recipient" column.
Other Excel data contains a title like "Dr.", etc and the full name of the recipient. Additionally the company name if exists that the recipient is working at is stored in the Excel data sheet. And for the address, we have Address and State columns. Of course the address data is fictional and may not be in the correct format that you need to use. If you have more columns to use in the address like country, etc or even if you want to print the phone number information on the label it is very easy to customize the template that will be used for label printing. We will see the label fields as a customization of the layout soon in this guide.
You can download this sample address data Excel file using the referenced link for your tests to print labels using Word document and Excel file as the data source of the label information.
And also you can download the final version of the Word template label-template.docx too.
First of all, let's create an empty Word document and name it as "label-template.docx"
Now open the Word document.
Go to Mailings tab.

Word document provides shortcuts to tools in Mailings tab to create templates for printing label, envelopes, etc and choose recipients from Outlook Contacts or from Excel data.
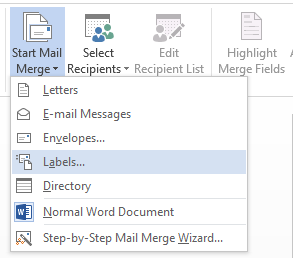
On Mailings tab, first press on Start Mail Merge ribbon button and choose Labels... as an option.
If you have the labels that you are going to print recipients and address data, probably you already know the label provider and label code.
If so, please choose the provider among Label vendors and the corresponding provider label from Product number.
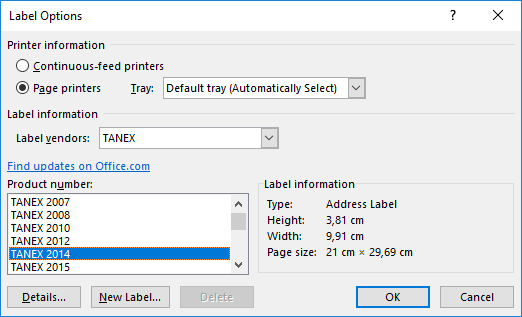
For example, I have TANEX 2014 so I made following selections on the Label Options screen.
If you don't know the vendor, you can choose a label which matches to your label sizes.
Or as an other option, you can create a new label and customize it according to the sizes of the labels you have
Click OK to continue with next step.
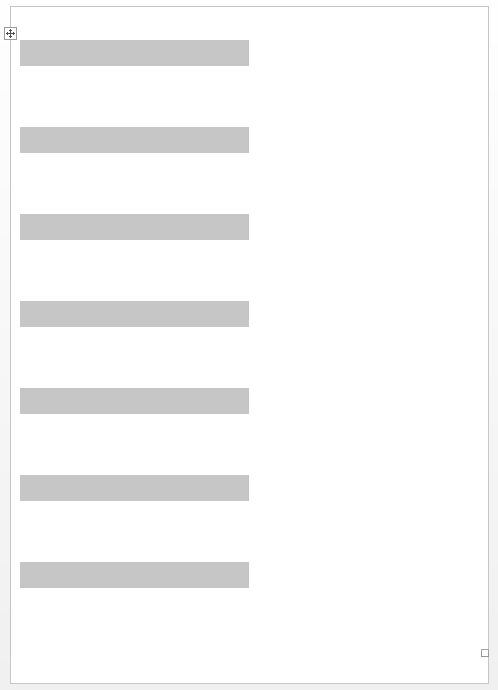
At this step, although you will see an empty Word document at first look, if you look carefully using Ctrl+A or partially select sections of the document, you will see 14 placeholders in two columns as seen in following screenshot.
Let's now define the recipients
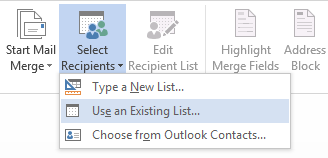
Click on Select Recipients button and choose Use an Existing List... option from the dropdown menu.
The existing list is actually our address data from Excel document.
If you want to read the recipient names and address data from Outlook, then you have to choose the third option Choose from Outlook Contacts...
This selection will open a file dialog where you need to point to the Excel document with recipient names and address information for printing labels.
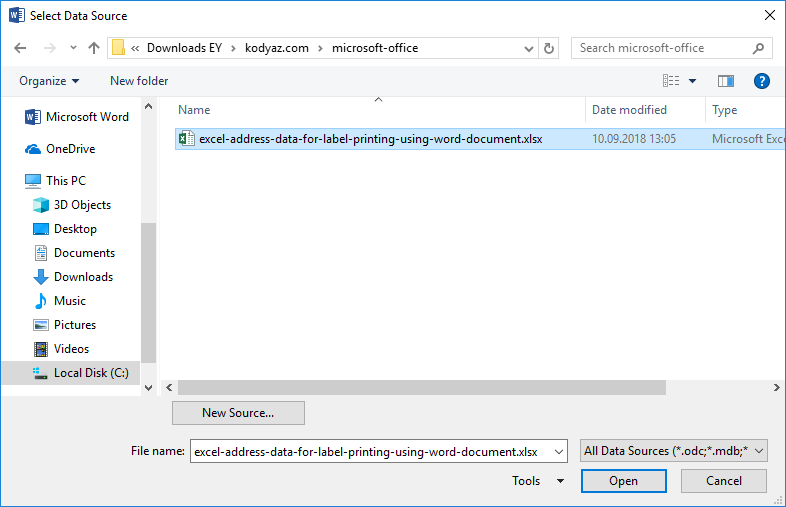
Click Open to choose the file.
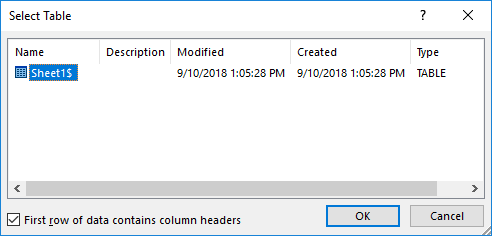
Then select the sheet that has the recipient names and address data
Now the view of the Word document is changed slightly and is in the following form.
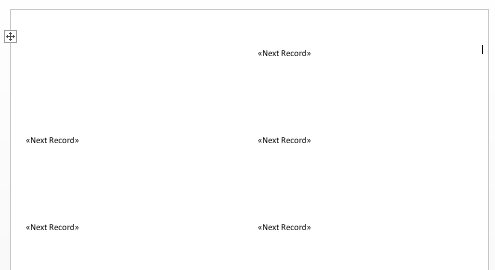
This Word document is actually a template and is only a single page document.
Since we have not yet started to customize labels and place Excel data within labels, the Word template is empty.
There is only <<Next Record>> which enables the Word document processor to read the next data row from the Excel file.
Maybe you will remember, I don't want to print labels for all rows in the Excel sheet.
And as a filter, I want to use the Recipient column value for each row in the Excel document.
If Recipient cell has Yes as value then it will be printed in the label and if it has No then I want to skip this line in the Excel while printing labels with Word document.
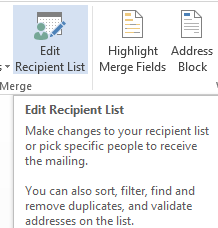
If you have a similar case, press Edit Recipient List button.
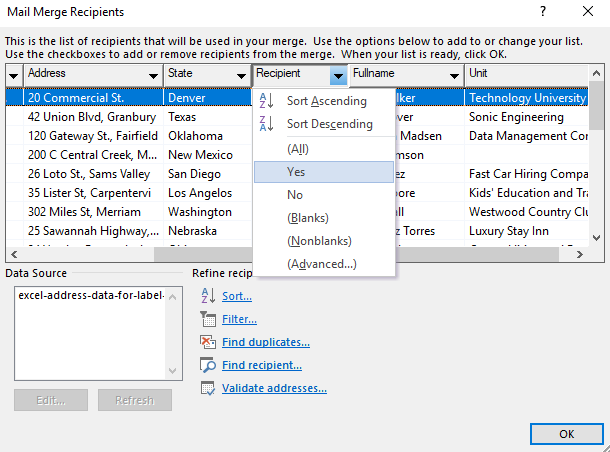
For my case, I selected rows with value "Yes" in "Recipient" column as seen in below screenshot.
Let's now add Excel data columns on to the Word label template.
Click on the top-left label placeholder area which is empty.
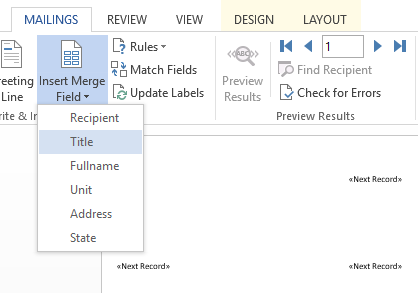
Then press Insert Merge Field button.
Either from the drop down list of field names existing on choosen Excel file or from the dialog screen which contains the list of Excel columns, choose Title and Fullname in order.
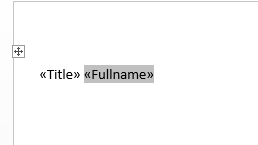
You see <<Title>> and <Fullname>> fields are placed on the Word template for printing labels.
It is more readable visually if you select Fullname and place a space character in front of it.
So it will not confuse readers with the Title information.
Press Enter after <<Fullname>> and in new line, add following fields in order using the same button Insert Merge Field
Unit field, then press enter to continue with a new line
Address and State fields with a space character between them.
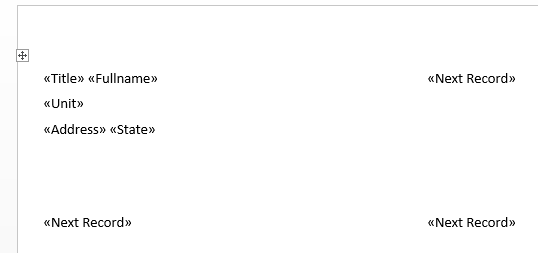
Placeholders in label template is shown only for a single label at this point.
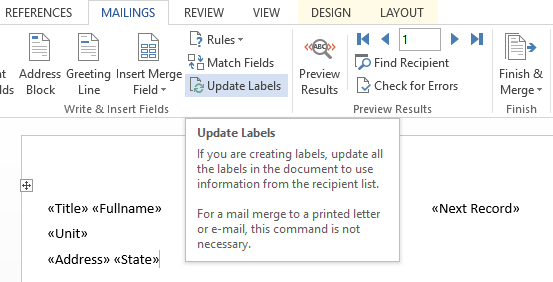
Please press Update Labels button shown in below screenshot.
Please note that, after every change you make on the template press this button before you want to preview your changes with sample data.
Now all changes on the basic label template is reflected to all labels in the Word template.
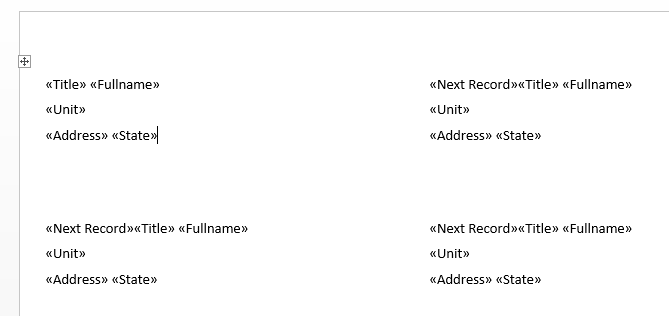
Now let's see how is the Word document is displayed with label design we have done up to now.
Click on Preview Results button.
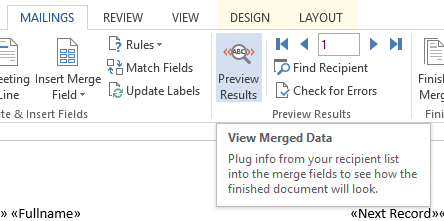
This option enables Word users to preview labels before printing them and see and make necessary corrections on the format of the labels.

Let's click to Preview Results button once more to switch back to design mode.
Highlight Title and Fullname and switch to Home tab to change the font and make them bold.
Then add a comma between Address and State
Then select all fields Title, Fullname, Unit, Address and State and right click then choose Paragraph.
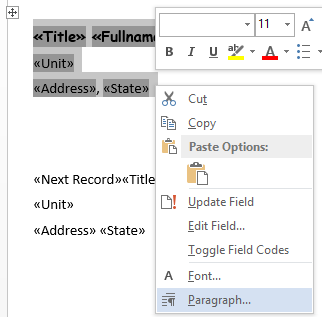
You can play with spacing, etc options for a better view.
In fact, for Word users it is possible to change the format and layout of the text via placeholders within the label itself.
For example, changing font of fullname and using another font and font size for address data.
Adding 1.5 lines spacing after first line where the recipient name is so it is easier to distinguish the name from the address, etc.
After you make your changes on the first label and want to preview the results, first click on Update Labels button.
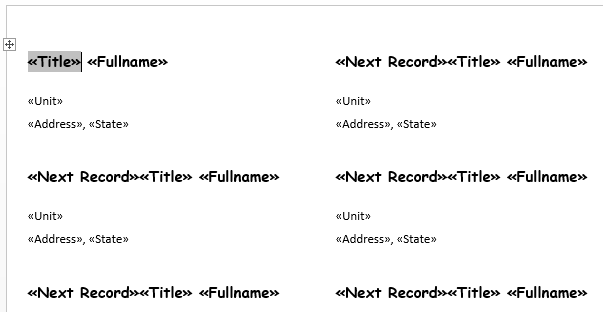
Now we are ready to preview the latest status of our label design made with Word by pressing to Preview Results button.
I believe it is better now from our first design.
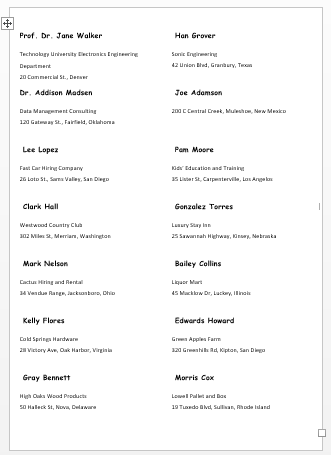
After you have made required corrections by switching between design mode and preview mode, you are ready to create the labels from this template document.
Again within Mailings tab on Microsoft Word menu ribbon, there is Finish & Merge button on the far right. Click on the button. Then choose Edit Individual Documents.
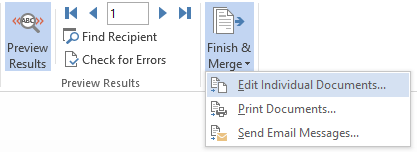
At thi point there is an option to choose data rows from the Excel document. If you want to prepare the labels for all rows in the Excel document, select All and press OK.
This selection will create a new Word document (Labels1.docx) where all data from Excel is displayed according to the formatting options we have designed in the Word template "label-template.docx"
This second word document shows a label for all data in Excel sheet that we selected as datasource for your label printing template.
As you will remember the Word template shows only a single page in preview mode
One last note, if you decide to make a change and want this change to affect all labels, like adding a new field on the layout from Excel, etc then you have to make this change again in Word template document "label-template.docx". Then you have to create another finished Word document using the Finish & Merge button on the template document.
