How to Create Master Project, SubProject in Microsoft Project 2010
Microsoft Project 2010 enables project managers define and create master project and subprojects in an easier way when compared to previous versions of MS Project.
Open the MS Project 2010 project file which you want to define as master project.
Then click on Task menu from the ribbon.
This action will display Gantt Chart view as the active view.
Click on the task row in Gantt Chart view where to insert subproject.
Then click on Project ribbon item from the top menu.
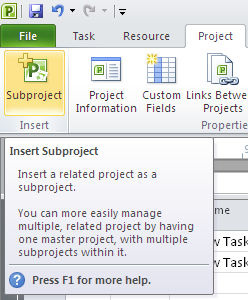
Project managers will recognize the Insert Subproject icon in the Project ribbon group.
Insert Subproject
Insert a related project as a subproject.
You can more easily manage multiple, related project by having one master project, with multiple subprojects within it.
Click on the Insert Subproject icon.
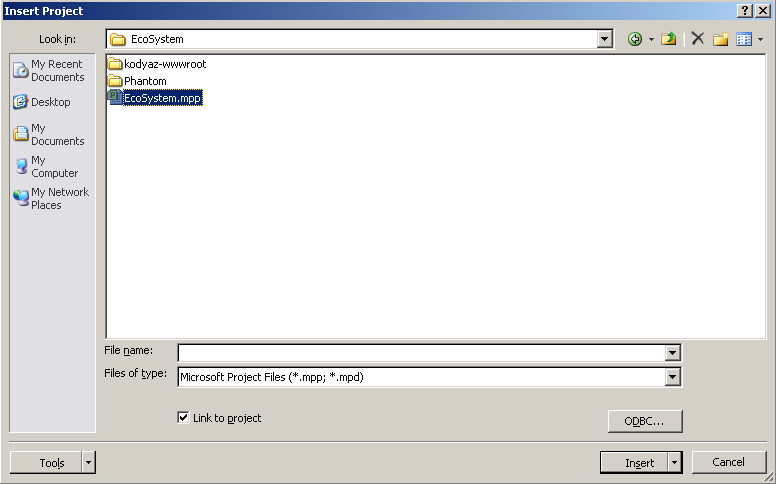
This menu action will open the Insert Project dialog screen where project managers can select the project .mpp file which they want to add as a subproject.
Browse the file folders and select the Microsoft Project file.
Click Insert buton to add project as subproject to master project in Microsoft Project 2010.
In the below screenshot you can see two projects which I insert subproject of a master project file.
In the task information cell, the subproject icon ![]() will help project managers to identify the subprojects easily than the normal project tasks.
will help project managers to identify the subprojects easily than the normal project tasks.
Project managers can view subproject details by drill-through the Task Name cell on the Gantt Chart view.
It is possible to set subprojects as readonly subproject.
To set subproject as read-only will prevent unauthorized people to mae changes on the subproject.
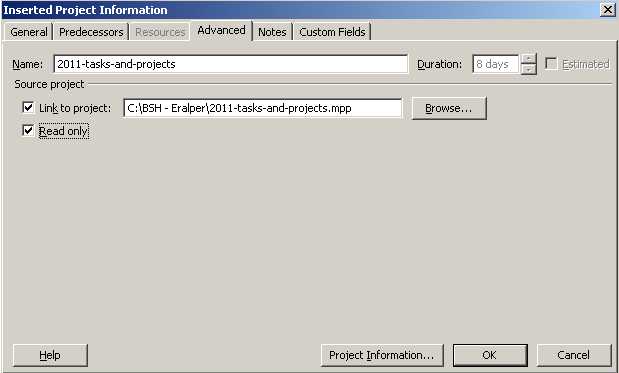
If you double click on the subproject task item in the Gantt Chart view, and goto Advanced tab of the Inserted Project Information screen, you will see a Read only checkbox.
By marking the "Read only" checkbox, a project manager can prevent changes on a subproject inserted in the master project he is responsible.


