Create Your First SAP HANA Calculation View
In this SAP HANA tutorial, SQL developers will create their first Calculation View using SAP HANA Studio. I'll provide SQLScript codes to create sample tables in your development schema and populate with sample data. In the following steps, I'll try to show how SAP HANA programmers can create calculation view step by step.
Launch SAP HANA Studio.
Switch to SAP HANA Development perspective.
In Systems tab, connect to your SAP HANA system.
Expand Catalog node in selected SAP HANA System and highlight your schema.
After schema is selected, open SQL Console to execute SQLScript codes for sample database table creation and sample data creation.
Copy and execute following SQL codes.
Create Column Table PurchaseOrders (

 POID int,

 EmployeeID varchar(5),

 VendorID varchar(5),

 OrderDate date,

 ItemID varchar(5),

 Quantity int

);

Create Column Table Vendors (

 VendorID varchar(10),

 VendorName varchar(255)

);

insert into Vendors values ('V01','Kodyaz Development');

insert into Vendors values ('V02','SAP HANA Professionals');

insert into Vendors values ('V03','Code for Future');

insert into PurchaseOrders values (1,'E01','V01','20170101','I01',1);

insert into PurchaseOrders values (2,'E02','V02','20170202','I02',5);

insert into PurchaseOrders values (3,'E03','V01','20170303','I01',1);

insert into PurchaseOrders values (4,'E02','V03','20170404','I03',10);

insert into PurchaseOrders values (5,'E03','V02','20170505','I04',3);

insert into PurchaseOrders values (6,'E01','V02','20170606','I02',5);

insert into PurchaseOrders values (7,'E02','V01','20170707','I01',2);

insert into PurchaseOrders values (8,'E01','V03','20170808','I03',1);

insert into PurchaseOrders values (9,'E04','V01','20170909','I01',1);

insert into PurchaseOrders values (10,'E03','V01','20171010','I01',2);
At this step, we will create our sample repository package and then create calculation view
In SAP HANA Studio SAP HANA Development perspective, connect to target SAP system, drill-down till your imported workspace.
Right click on workspace name.
In context menu, choose following menu options: New > Repository Package...

In Package Name textbox, type your target package name in a structured way.
Each "." will create a sub package under the first repository package.

Click Next button.
The following screen will enable SAP HANA developers to edit repository package properties.
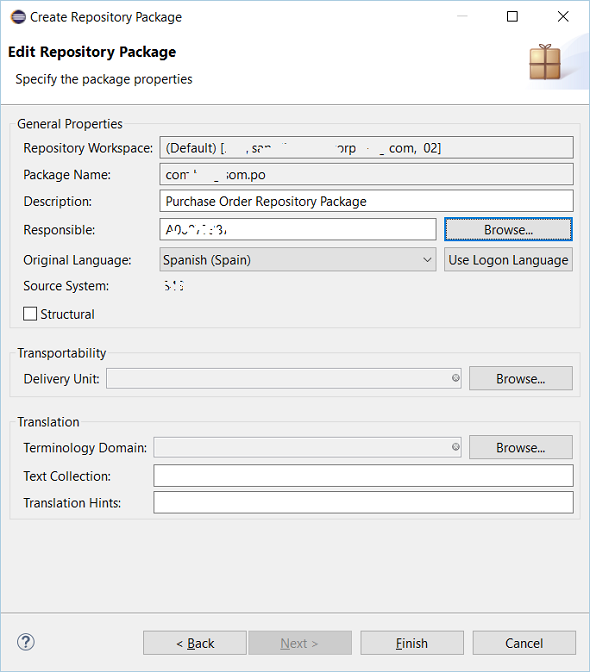
Press Finish
Refresh workspace by right-click on workspace name and choose Refresh from context menu
Now you can drill your workspace for new repository package
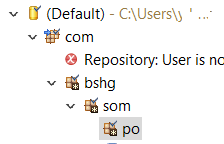
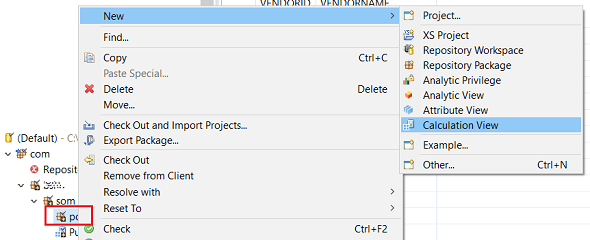
Right click on your recently created package and by following context menu options, we will create our first calculation view
Type a name for your new calculation view.
For this tutorial, we can use Graphical calculation view instead of SQL Script calculation view type.
Also don't make a change in Data Category option. Keep Cube instead of Dimension option.
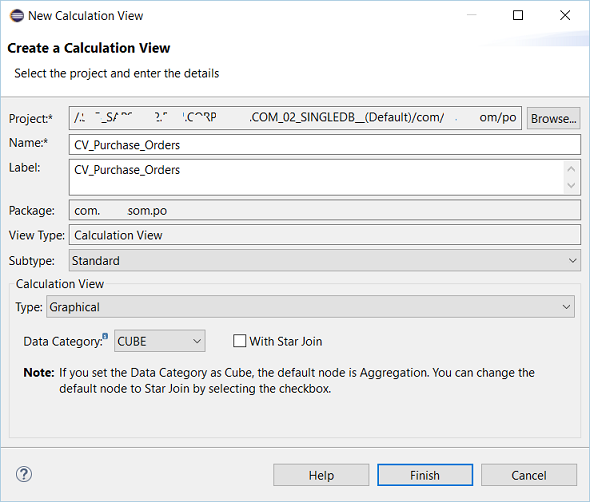
Click Finish
As seen in above screenshots, CV_Purchase_Orders sample calculation view is created and opened in SAP HANA View Editor
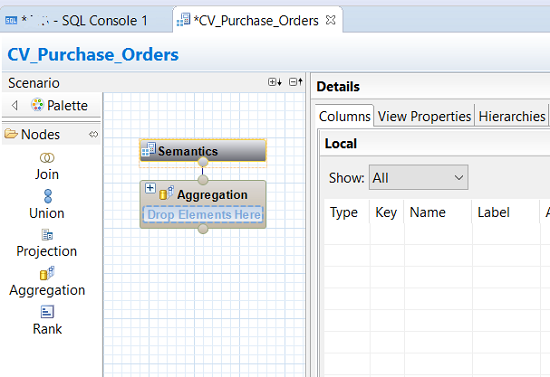
By default, there is no input base table is selected. SQL developers will build their first calculation view from scratch
The first step is adding base tables for our calculation view.
From Palette section, select Projection and drag-and-drop it for each base table on to the layout.
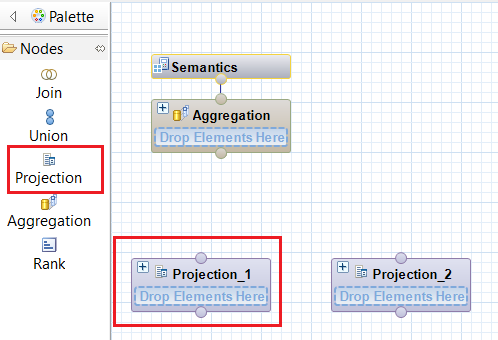
We will use 2 database tables; PurchaseOrders and Vendors.
Right click on Projection_1 and Rename first node as "PurchaseOrder"
To select the base table, highlight projection node. Then click on green plus "+" sign.
When "Find" dialog screen is displayed, type and search for the database table "PurchaseOrders".
When desired source table is listed, choose it and press OK button to move it as the source table for Projection node.
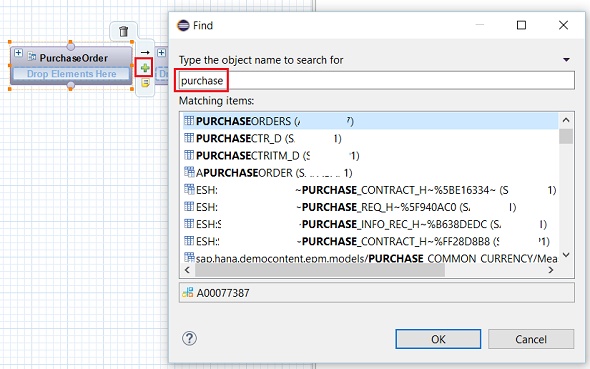
Follow the same process for HANA database table selection for second projection node.
This time, developers should choose Vendors table.

To choose table columns for calculation view among base table fields, click on projection node "PurchaseOrder" on Scenario Layout.
On Details layout, programmers can see table columns.
Right click on selected fields and select Add to Output option.
It is possible to select multiple field selection to add to output.
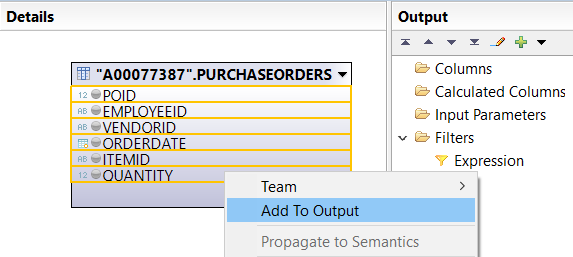
Here are the output columns
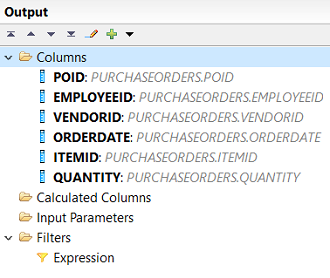
It is also possible to add new calculated columns at this point.
By right-click on Calculated Columns, select "New..." to Create a Calculated Column
Type a name for new column, choose data type and provide expression which formulates the calculated field value.
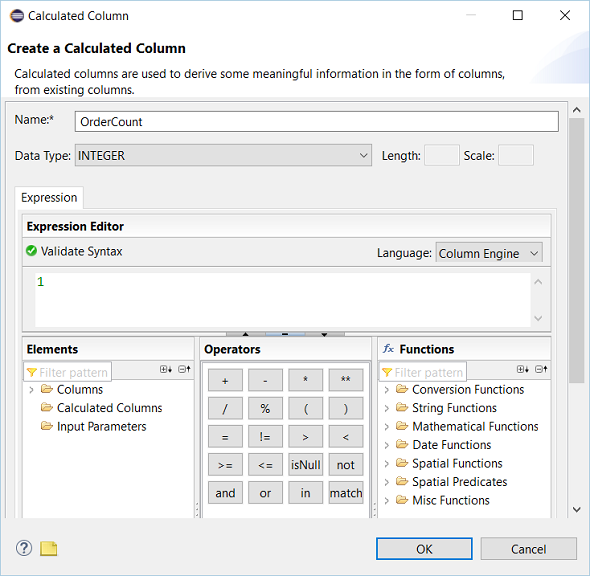
Follow the same process for output column selection for Vendor projection node.
Developers can Save calculation view development at any time by pressing Ctrl+S or using Save icon on top menu.
Now, SQL programmers will use JOIN node to join these two projection nodes; PurchaseOrder and Vendor
Drag-and-drop Join node on to the Scenario layout and change the default name of the Join
To combine tables for Join node, draw a line from projection node to Join node as seen in below screenshot.
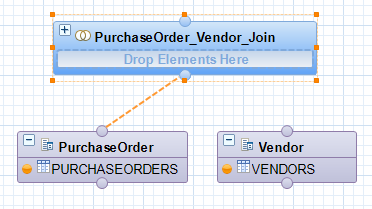
Link circles of PurchaseOrder and Join node.
Do it for the Vendor table too.
After linking tables to Join node, these tables will be listed within the Join node as seen in below screenshot.
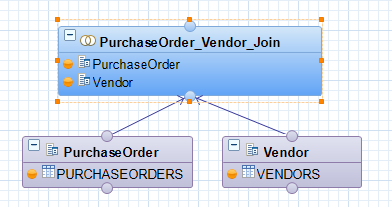
On Details layout, developers can join two tables by linking referencing columns to each other. Developer can further configure join condition by double-click on the link.
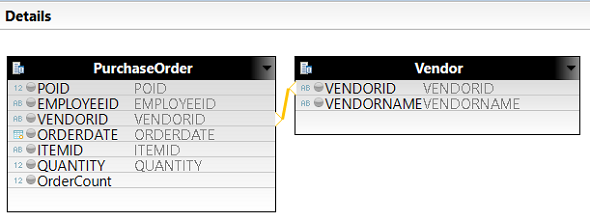
At this step, programmers will choose output columns of the SQL Join. So select required columns and "Add to Output"
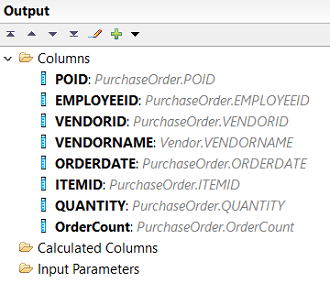
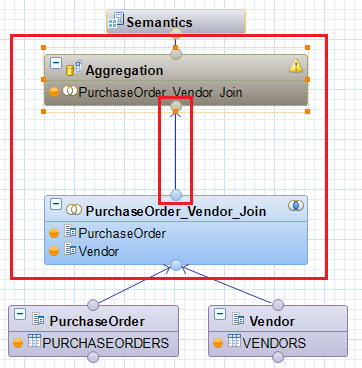
The next step for creating calculation view in this tutorial, will be linking Join node to Aggregation node on the scenario layout.
When you draw a line from Join node to Aggregation node, the Join node name will be visible in Aggregation node box.
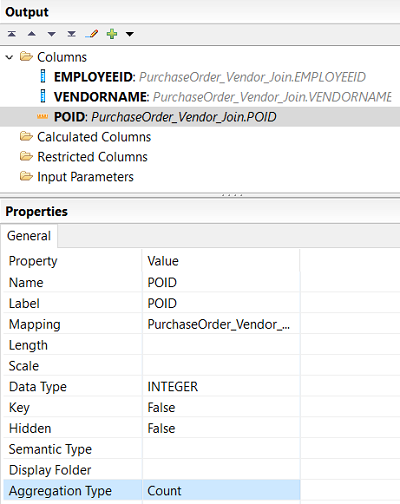
Do the following output column selection for the Aggregation step.
Select "EmployeeID" and "Add to Output"
Select "VendorName" and "Add to Output"
Select "POID" and "Add As Aggregated Column"
On Output section, click POID and change Aggregation Type property from default Sum to Count
Now select Semantics node to make last configuration changes.
You can change the calculation view column labels, hide them.
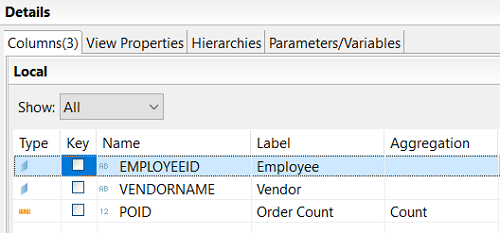
Click on green OK button to save and validate calculation view.

If everything is OK, "Validation of the model is Successful" will be reported in logs.
Developers can now activate SAP HANA calculation view by pressing the below icon.

It is now time to display calculation view data.
Click on Semantics node. Right-click on it to display context menu.
Choose Data Preview menu option.

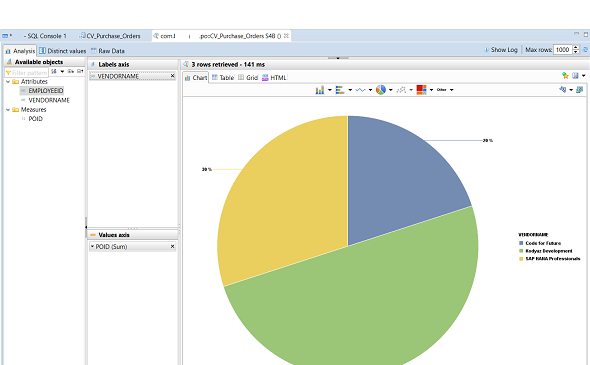
By default an empty Data Preview screen will be displayed. Only Available Objects window will list calculation column attribute fields and measures.
By drag and dropping attributes and measures, Calculation View data can be displayed in different ways with different output and chart options.
Of course, to use this calculation view in any other SAP HANA developments, we can directly reference this view in FROM clause.
The calculation view is created in "_SYS_BIC" schema by default.
So SAP HANA programmer can execute following SQLScript SELECT statement for example:
SELECT * FROM "_SYS_BIC"."com.kodyaz.som.po/CV_Purchase_Orders";
In case you experience following error when you try to execute a SQLScript query on new calculation view; its reason maybe lack of SELECT permissions for _SYS_REPO on database table's default schema.
Repository: Encountered an error in repository runtime extension;Model inconsistency.
Create Scenario failed: The following errors occurred: user is not authorized (2950)
Following GRANT command can help SAP HANA developers to resole this authorization problem
GRANT SELECT ON SCHEMA YourSchemaName TO _SYS_REPO WITH GRANT OPTION;
I hope this SAP HANA tutorial will be helpful for SQL developers to start creating calculation views on SAP HANA Studio.
