SAP Smartforms Tutorial - How to Create Smartform
Type SAP transaction code smartforms in order to start Smartform screens.
Using SAP smartforms tcode, ABAP developers can create new smartform documents or maintain Smartform documents created before.
It is also possible to create SAP Smartform Style documents and maintain styles using SAP smartforms transaction code.
It is best practise to create SAP Smartforms naming convention in order to easily maintain Smartform documents easily.
You can module name, country code, form type or form usage codes as name of the SAP Smart Forms document.
Let's start this SAP Smart Forms tutorial with initials steps to create Smartform document.
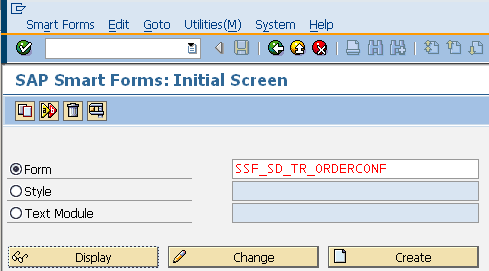
After you supply a unique name to the SAP Smartform document, click on Create buton to create SAP Smartform document.
An empty SAP Smartform document consists of the following base items and objects.
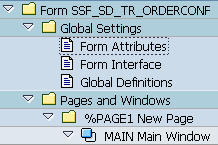
In the Global Settings, SAP Smartform developer can define the basic properties of a Smartform document.
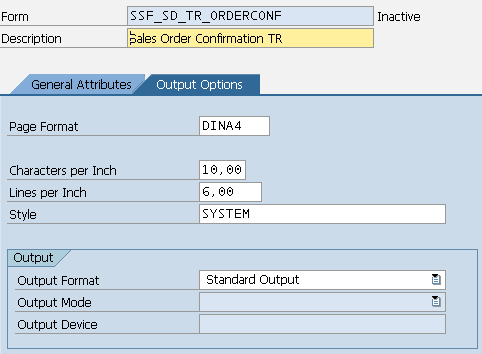
If we go to Form Attributes node, we can see ABAP developers can define or display Smartform properties like the Smartform description, Smartform document language...
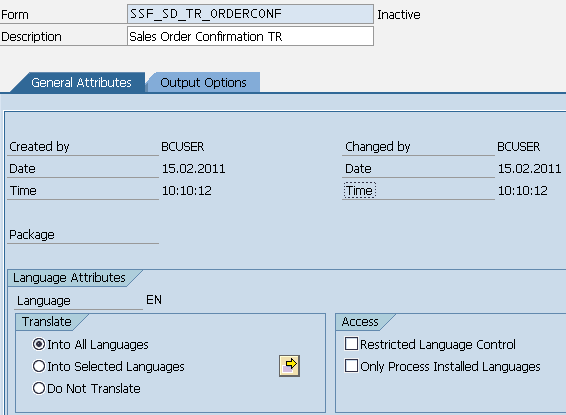
And page format of the resultant output, characters per inch as resolution, lines per inch, default style document and output format, etc.
Form Interface enables SAP Smartforms developers to export and import Smartform parameters.
The following import parameters are created by default and all are optional for processing a SAP Smart Forms document.
ARCHIVE_INDEX
ARCHIVE_INDEX_TAB
ARCHIVE_PARAMETERS
CONTROL_PARAMETERS
MAIL_APPL_OBJ
MAIL_RECIPIENT
MAIL_SENDER
OUTPUT_OPTIONS
USER_SETTINGS
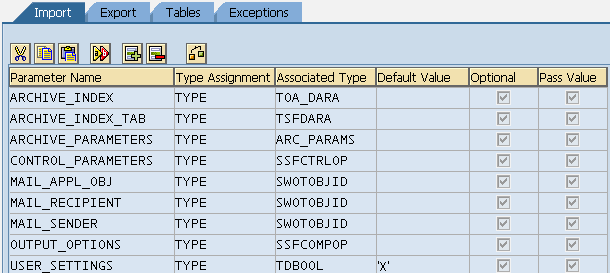
There are also 3 default export parameters created default:
DOCUMENT_OUTPUT_INFO
JOB_OUTPUT_INFO
JOB_OUTPUT_OPTIONS
Global Definition tab enables ABAP developers to define custom types, field symbols, form routines and global variables that will be used in the SAP Smartform.
Also Smartform developers can code in ABAP in the smartforms initialization period using the Initialization tab before processing any form windows and codes.
Let's create Smartform output as a sample document in this Smart Forms tutorial.
Go to Global Data tab in Global Definitions and define the following variable internal table :
GT_STXFADMT TYPE TABLE OF STXFADMT
Go to Field Symbols tab in Global Definitions and define the following field symbol :
<FS> TYPE STXFADMT
Now the last tab we will work on for this SAP Smartform tutorial is the Initialization tab.
Go to initialization tab and paste the following ABAP code :
SELECT * INTO TABLE GT_STXFADMT FROM STXFADMT.
Also in the Output Parameters table, add the global internal table variable GT_STXFADMT.
Now we are ready to display Smartform documents list using table in our sample Smart Forms tutorial output.
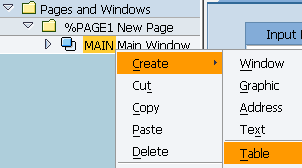
Go to MAIN (Main Window) and right click on the Main Window node to display context menu.
Choose CREATE > TABLE menu options.
Enter the Table name and Description to make it easily understandable why the Smartform table is being used.
Go to the Data tab where we define the datasource for the Smartform table data.
The data of the table will come from the internal table variable GT_STXFADM.
Since we have already defined a field symbol, we will use the <FS> field symbol in order to display each row on the Smartform table.
So the Data tab will have Internal Table GT_STXFADM A Assigning <FS> instead of I Into an approtiate workarea.

After defining Smartform table data, we can now continue with table line definitions.
Goto Table tab back. Click on Details buton.
If ABAP Smartform developers look at the below screenshot, they can see that I've defined a new table line type ITEMSLINETYPE with 5 columns.
The line columns have 7 CM, 1.5 CM, 3 CM, 1.5 CM and 3 CM width in order.
The total line width, the sum of the column width values must be equal to the Table Width value.

After SAP Smartforms developer define table line types, we can continue our SAP Smartforms tutorial with next step.
Let's create table line under table Main section.
Right-click on Main Area of the Smartforms list table as seen in the below screenshot.
Choose Create > Table Line menu option.
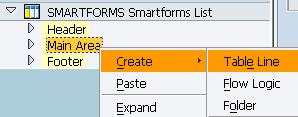
When a dummy table line is created under the Main Area of the table, provide line name and line description.
The most important characteristic or property of a table line is its Line Type property.
Choose the appropriate line type from the combobox. Note that this combobox is populated with table line types created in table cotrol's Table tab Details screen.
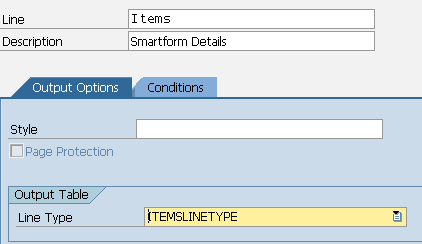
After the line type selection is done, SAP Smartforms will create table cells under the Table Row node as seen in the following screenshot.
The number of table cells is controlled by the line type.
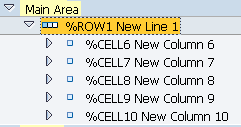
Let's now create a text object that will display a field value from the field symbol <FS> representing a Smartform detail from GT_STXFADM internal table.
Please remember that we have read the contents of the GT_STXFADM ABAP internal table from ABAP STXFADMT table.
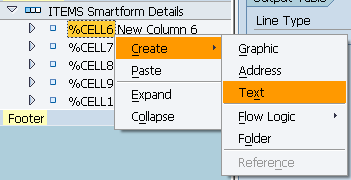
Right-click on the table line cell. Choose Create > Text menu options.
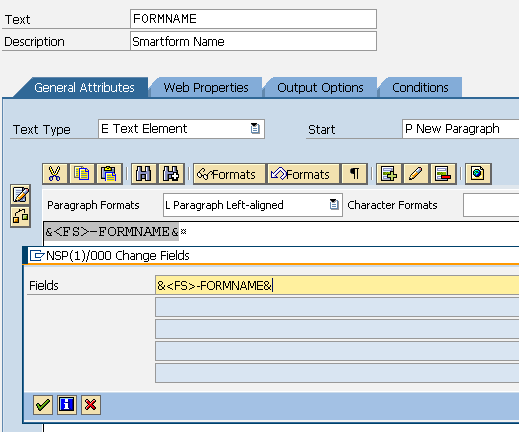
You can see below how I filled necessary text properties in order to display SAP Smartform name in this table cell using Text control.
First, you can provide a descriptive name for the text control.
Please note that Description is optional for Smartform controls. If it makes to crowded view on the left pane of the Smartform design layout you can clear the Description information.
If a Smartforms developer wants to display a field from the workspace or field symbol, click "Add" icon.
Then surround the data with "&" in order to mark it for reading from internal structure.
For example, I typed : &<FS>-FORMNAME&
You can use something like : &WS-VBELN&
One last important issue here, all letters must be typed in CAPITAL LETTERS.
Otherwise, nothing will be displayed for that item.
The Pencil icon can be used to edit field.
Using the Minus icon is used to delete field.
If you want to add static text to the Text control, you can directly insert text by typing without using Add, Edit, Delete icons.
After you finish with Smartform click Activate button to activate the SAP Smartform.
This will create a function module behind for the executable ABAP codes of the Smartform document.
Here is the last step in our SAP Smartforms tutorial where we create sample SAP Smartform document.
Run the Smartform report with F8.
You might have to select a Destination printer for Print Preview of the SAP Smartform.
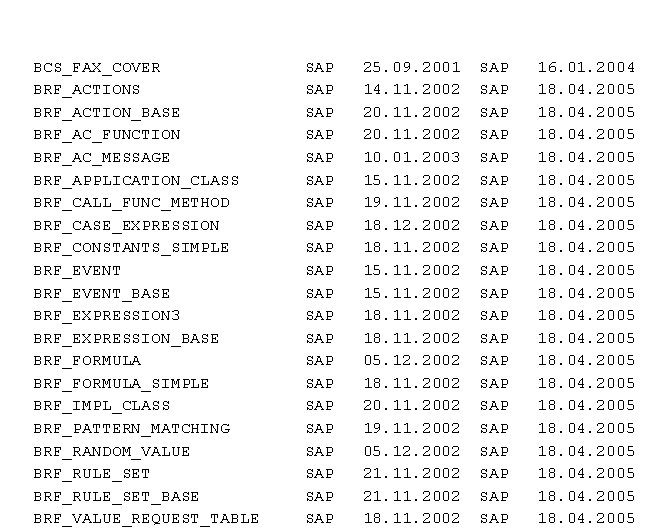
Here is the SAP Smartforms created on a SAP system which we list using a SAP Smartforms report.
