Xray Test Management Tool Inside Jira Issue Tracker Software
Especially for companies using Atlassian JIRA Project Management Software for issue tracking requirements, it is possible to create tests and track test results using Xray test management addon tool. In this JIRA guide, I want to demonstrate how to maintain your company's software test management process
Xray Test Management tool enables users to manage their tests inside Jira software.

Besides sample case shared in this tutorial, if you want more details please watch webinar recording published at youtube
This Xray guide is based on the webinar with different samples.
Test Management in JIRA Issue Tracker
Xray test management solution is based on Requirements and the process works with creation of a requirement.
Requirements and defects are two main concepts commonly related with Tests and test concept.
As a definition a requirement represents a singular documented physical and functional need that a particular software, product or process must be able to perform.
As a definition a defect represents an error, flaw, failure in a computer program or system that produces an incorrect or unexpected result, or causes it to behave in unintended ways.
Requirement and defect are two concepts that can be mapped to different issue types in organizations.
The same issue type can be both a Requirement and a Defect.
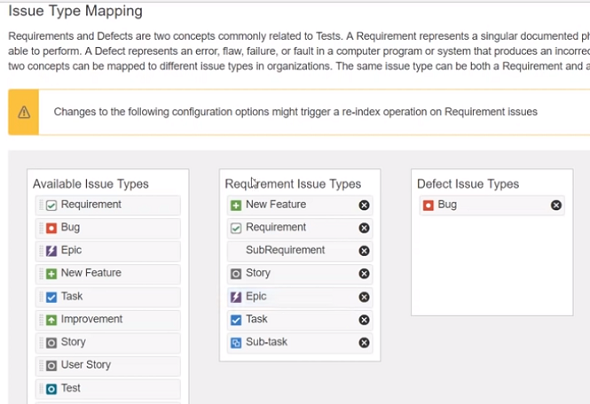
For example, above screenshot shows that one of the issue types mapped to requirements is "Story"
Additionally, "Bug" issue type is mapped to defects.
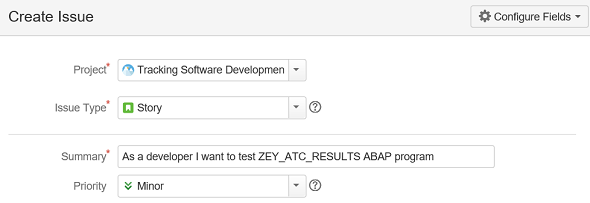
First create a requirement using one of the mapped issue type.
For example, I created a new issue using "Story" issue type providing short summary
After issue is saved, open it in display mode.
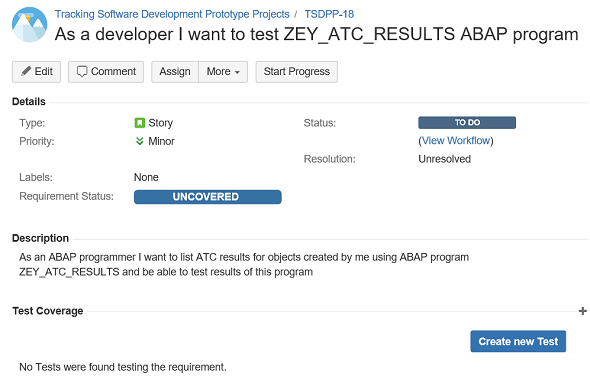
There is a new field "Requirement Status".
Uncovered requirement status means there has not any test made in that version for that story.
There is a Test Coverage panel showing all the related tests that are covering this story.
You can create a new test using "Create new Test" button.
Let's create our first Test
"Create new Test" button that will create a test issue which is linked to our sample story (requirement).
When the "Create new Test" button is pressed, the type of the new issue will be automatically set to "Test"
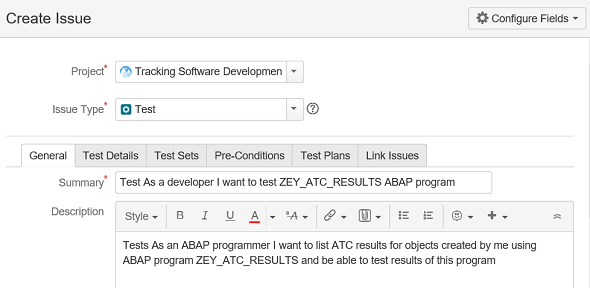
Test issue type is like a basic test template either manual or automated tests. In parallel these are the test types that can be covered by using Xray in JIRA.
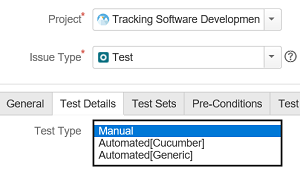
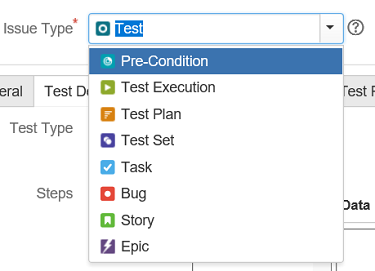
While creating your first test, if you open the issue type dropdown list, you will see a number of new issue types introduced with Xray addon.
These new different issue types include; Test Set, Test Execution, Pre-Condition, Requirement and Test Plan.
Test Set can be considered as a group of Tests.
You can put a Test into different Test Sets grouped logically.
A pre-condition, before executing your tests some initial conditions must be fulfilled.
Pre-conditions can be used for different tests.
Test Execution is like a task for executing a bunch of Tests
Each time you want to execute a Test or a group of Tests, you create a Test Execution
Assign it to someone.
Test Execution will contain the results of that test
Test Plan allows you to group different Test Executions and to track of tests of different executions
Contains latest status of Test Executions.
Let's continue with creating our first Test issue.
Modify fields in General tab if required. Then switch to Test Details tab.
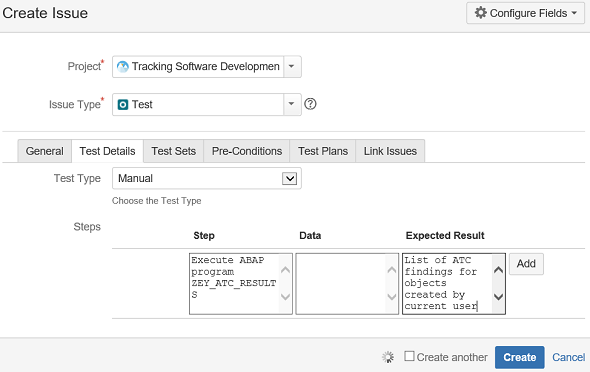
Test Details tab is important.
There is Test Type (let's continue with Manual test type)
Then there is Steps dialog.
The tester can also see what to expect as output for each step.
Don't forget to press Add button while defining test steps.
It is better to create the test issue first. Then modify the test and define test steps later.
Other tabs are Test Plans and Pre-Conditions tabs which enable you to directly associate them with current test.
For example, you can directly create pre-conditions like, having a valid SAP user on target SAP system and having the authorization to run SE38 transaction code.
Link Issues tab enables the relation with our Story (requirement) and Test issues.
After you save and create the Test type issue on Create Issue screen, you might experience following warning incase Xray custom fields configuration is not yet completed
Create Issue screen for issue type Test must have following tabs configured.
Otherwise, following warning message will be displayed

Xray Custom Fields Not Configured
This section cannot be displayed because some required custom fields are not configured.
Please make sure this project is using an "Issue Type Screen Scheme" which contains the Xray Screen Schemes. In order for Xray custom fields to be editable, they must configured for this issue type's CREATE/EDIT screen.
If everything is OK, on Test issue, you will see Test Details section with test type as Manual selected by default from previous steps and including tests steps.
There are other types for test data.
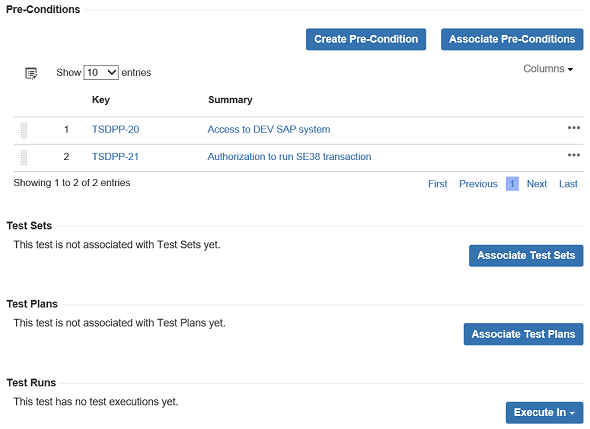
For example, Test Runs shows the results of test executions.
It is possible to run test using "Execute In" button. That is call ad-hoc test execution.

Follow the option "New Test Execution..." and complete your first ad-hoc test execution.
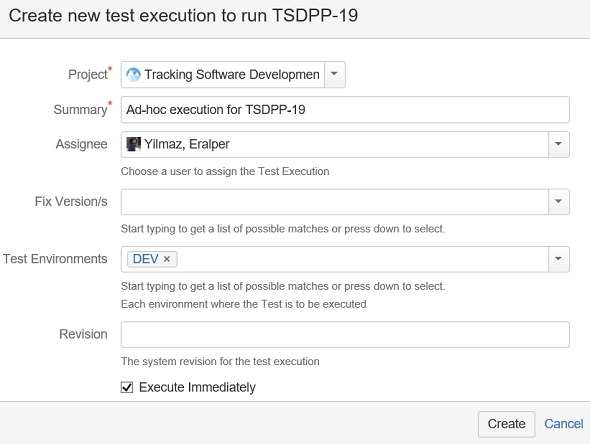
Make sure the "Execute Immediately" checkbox is marked. Press Create.
When the test execution is created, go down to "Execution Details" section.
Look for Test Steps.
If you have more than one step, follow each step in order.
You can add comments for each step. If you have failed in completing the step successfully, you can create a bug using creating a defect.
If you have successfully completed the test step, you can add evidence for example a screenshot.

Use color icons to mark the completion of the test execution step. Green points to a successful test completion.
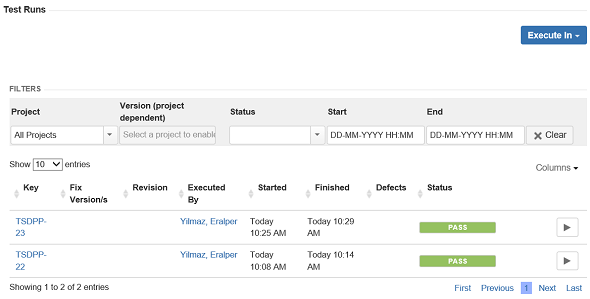
Test execution results will be displayed under Test Runs section of a Test issue.
Test Issue Links section shows the relation between the current test execution and the Story issue (or requirement).
If you have created and completed the ad-hoc test execution, on user Story issue, requirement status will be updated as OK. If you have not executed and test execution, the requirement will be as NOTRUN since we are not ready to execute any tests. Additional tests can be created under same requirement, our user Story issue.
Let's now create a Test Set using the top menu Create button on JIRA Issue Tracker software.
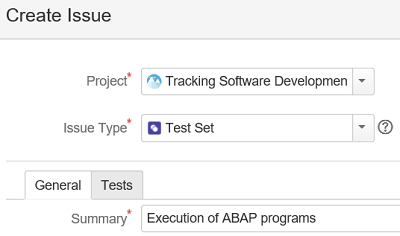
Use Tests tab to include tests into this test set.
After Test Set is saved, on display under Tests section, included tests list will be visible.

Before executing tests, a Test Plan must be created in order to track execution of tests. It is common that these tests will be executed multiple times in future. To track execution of this group of tests, test set, a test plan must be created.
Again using the top menu in a JIRA issue tracker software, create your test plan.
Choose Test Plan as the issue type.
On Test Plan Details tab, you can select tests one by one or add them as a group using Test Set.
![]()
On a test plan screen, the tests included in that test plan can be viewed under Tests section.
The status of this test plan is shown as "2 TODO" in the same area.
Each test's own status is viewed as TODO in the list view of included tests.
If you click on the errors just in front of each test, the test execution details for that test will be displayed.
Since no Test Executions are assigned these tests, there is nothing to display at this moment.
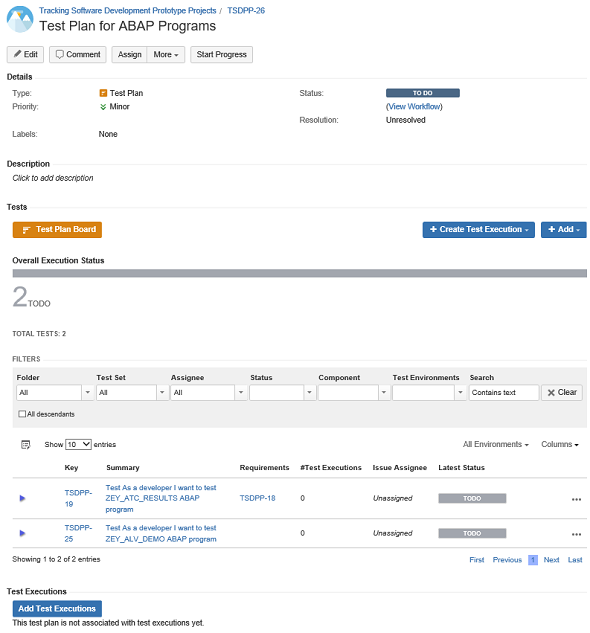
Using Create Test Execution button for "All Tests..." we can define a new test execution for all the tests included in current Test Plan.

You can choose an assignee, test environment, etc.
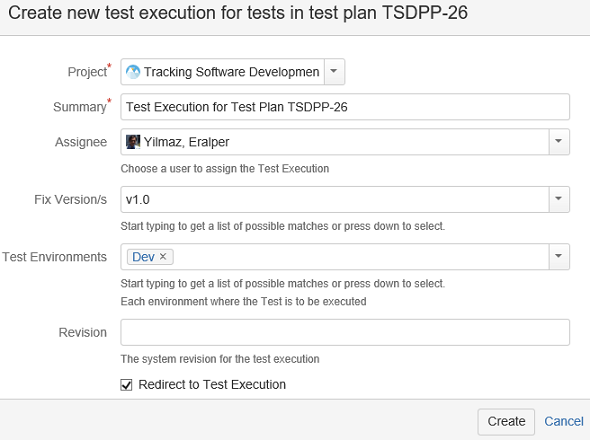
This type of a Test Execution is called "Plan Test Execution" since it is linked to a Test Plan different from an ad-hoc test execution
We can track the plan test execution status using the "Overall Execution Status" bar.
Each single test's execution status can be viewed in a detailed way in the list view, too.
Each single test can be assigned to a different assignee than the default test execution assignee using the "..." button.
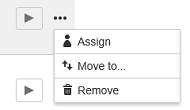
And each single test can be executed by using the Execute icon button.

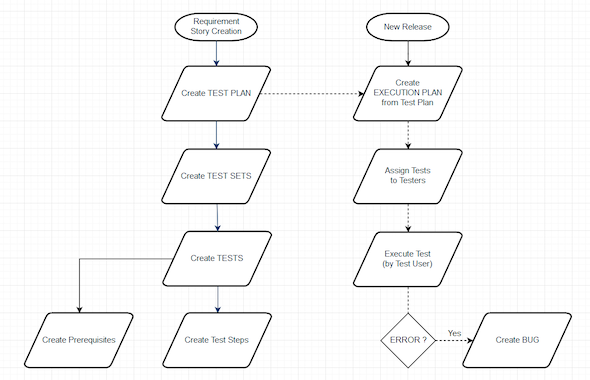
To summarize the flow of creating test sets, execution plans and test executions following flow diagram may be helpful for test managers using JIRA XRay component.
Test Reports for Tracking Test Execution and Test Results
Xray add-on has a number of reports by default used to track your test executions and results of the tests in a more visible way.
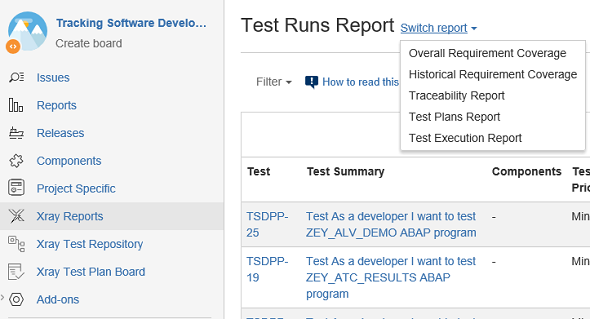
These reports are:
Overall Requirement Coverage Report,
Historical Requirement Coverage Report,
Traceability Report,
Test Plans Report,
Test Executions Report,
Test Runs Report
Using these reports, a test manager can track the status of the test executions including failed tests or still waiting in TODO status, etc.
Xray Test Plan Board enables easily selection among created test plans and viewing the status of test executions covered in that test plan.
I hope this guide as an introductory tutorial for Xray Test Manageement Tool in JIRA will give you a brief idea about how users can manage their tests within tools provided by JIRA IssueTracker software.
