Create MySQL Database Connection on CloudBeaver Database Management Tool
CloudBeaver is a browser based database management tool including MySQL databases and also a SQL development tool for data professionals. On CloudBeaver administrators can define MySQL connections using Connection Manager as shown in this tutorial and grant access to CloudBeaver users to connect to these database platforms using their own credentials. This tutorial shows the steps for CloudBeaver admin and users to create MySQL database connection. For the sake of the tutorial, I connected to an AWS RDS MySQL database instance as an example.
First of all, login to CloudBeaver browser based database management application as administrator. Administrators can create database connections that selected CloudBeaver users can be authorized for those connections. CloudBeaver users can also create connections which are only available for their access during the active current session.

As a CloudBeaver application administrator, now I will create a MySQL connection which is launched as an AWS RDS instance on Amazon cloud. Switch to "Administration" screen
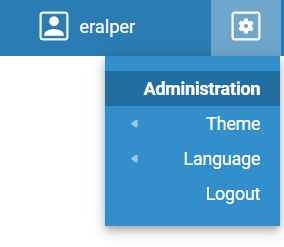
When the Administration screen is displayed, by using the left menu display the "Connection Management" configuration screen.
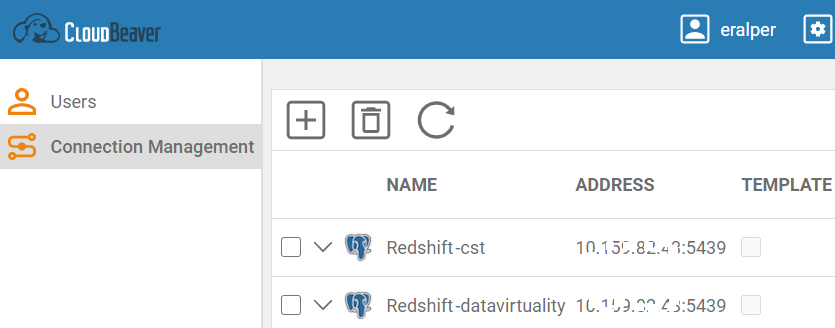
Click the "+" button to create a new database connection on CloudBeaver
By default, CloudBeaver has support for following database platforms:
MariaDB
PostgreSQL
SQLite
ClickHouse
Derby Server
Firebird
H2 Embedded
MySQL 8+
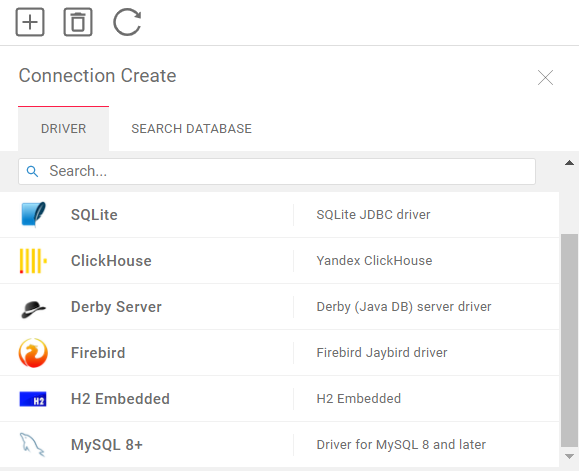
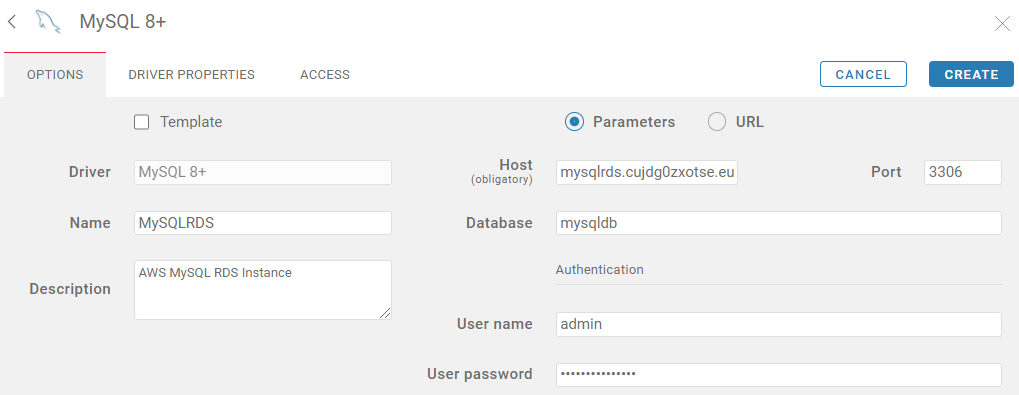
CloudBeaver MySQL connection parameters
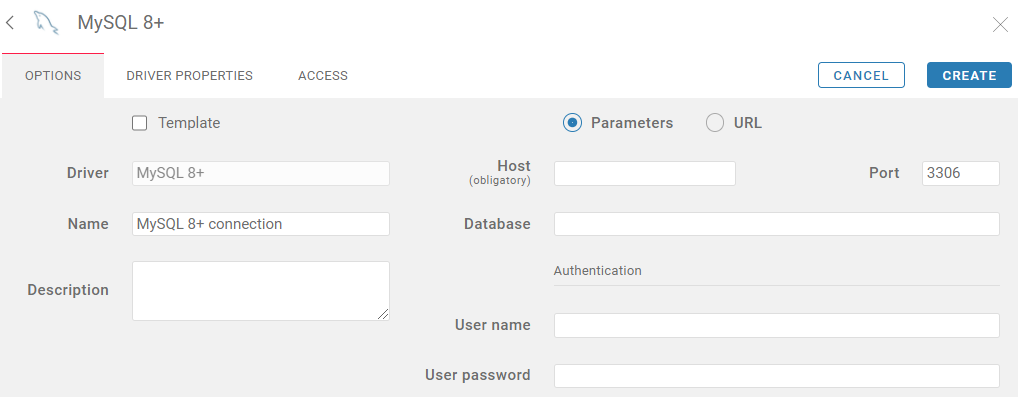
Name and description text will help CloudBeaver users to separate connections.
Host is the IP address or the DNS name of the MySQL server.
On AWS RDS console, the host can be found as endpoint on "Connectivity & security" tab of the MySQL RDS instance.
By default, MySQL database port for connectivity is 3306
Database is the target database which you want to access via this connection.
The Authentication section is very important.
If you enter User name and User password for this new MySQL connection, every user you grant access to this connection will automatically logon to the database without providing any credentials.
If you create the connection without entering any username and password, even you grant access to this MySQL connection to CloudBeaver users, they will have to provide a valid database user credential to logon successfully. By selecting this method, administrators can force CloudBeaver users to logon with their own credentials which is more secure.
After all connection parameters are provided press Create button.
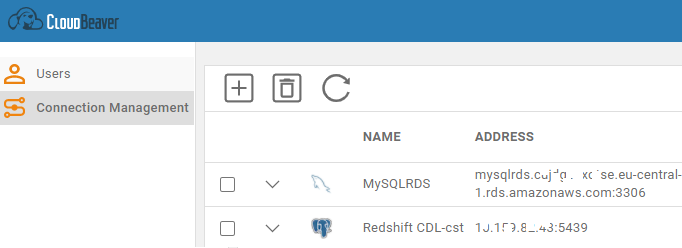
After you press Create, the connection will be listed successfully
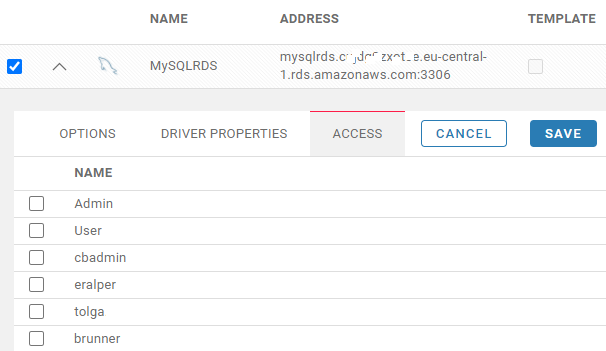
To enable CloudBeaver user to use to MySQL instance that has been created recently, click on connection for details and switch to "Access" tab. By marking the checkbox next to the users, CloudBeaver administrator can let users for AWS MySQL RDS connection.
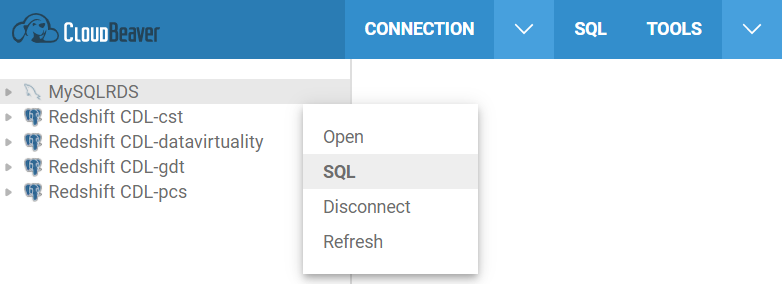
To connect to the MySQL database and execute SQL, go to CloudBeaver homepage and click on MySQL connection name. From the top menu, click on SQL text to launch a new SQL editor screen. Or when you click on the MySQL database item and open the context menu of it, select SQL from menu to open a new SQL editor.
If the authentication details, database user name and user password, are entered while creating the MySQL connection, then CloudBeaver users will be logged in to the database and a new SQL editor will be launched automatically.
On the other hand, if the database user credentials section was left blank during MySQL connection, then the CloudBeaver user will be requested to provide their own database credentials to be validated on MySQL. Only after username and password are validated, a new SQL editor screen will be displayed.
I hope, MySQL users will like CloudBeaver browser based universal database management tool to develop their SQL codes.
