Connect Amazon Redshift Database from Exasol using JDBC Driver
In this Exasol Analytic Data Warehouse tutorial I want to show how to upload Amazon Redshift JDBC driver and define connection object in Exasol database using SQL code to execute IMPORT command with SELECT command to fetch data from remote data source Amazon Redshift cluster.
First of all, download Amazon Redshift JDBC driver from docs.aws.amazon.com
During prepating this Exasol tutorial, I downloaded and used Amazon Redshift JDBC driver file: RedshiftJDBC42-no-awssdk-1.2.37.1061.jar
As the second step, launch EXAoperation Web based UI and logon to the EXAoperation with admin account.
Following "EXAoperation > Software > JDBC Drivers" and go to the JDBC drivers tab where all existing previously uploaded and preinstalled JDBC drivers are listed.
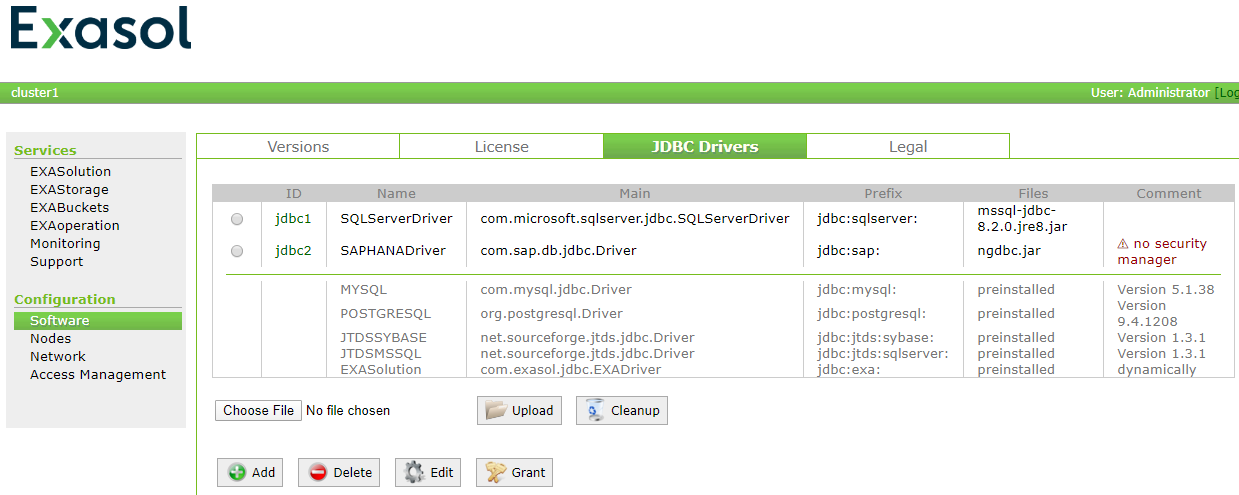
Click "Add" button to add a new JDBC driver definition for Amazon Redshift Data Warehouse connection.
![]()
When the EXACluster JDBC Driver properties screen is displayed, provide following details on input text areas for Amazon Redshift JDBC driver:
Driver Name: RedshiftDriver
Main Class: com.amazon.redshift.jdbc.Driver
Prefix: jdbc:redshift:
Disable Security Manager: CHECKED
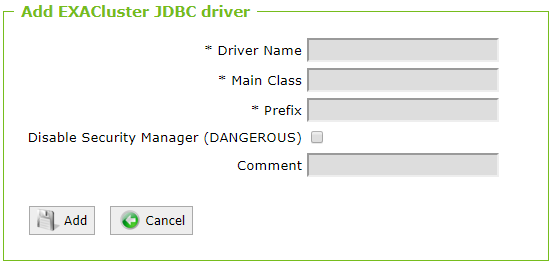
Please note that the "driver name" property is up to you to distinguish the driver entry from others. Of course entering a brief comment will help a lot, too.
Main class name for the JDBC driver is very important. This information is given by the vendor or the publisher of the JDBC driver you have download. For Amazon Redshift, the class name com.amazon.redshift.jdbc.Driver is also informed at page where you have downloaded the JDBC driver
For prefix, you are again nearly free. But the prefix must begin with "jdbc:" and end with ":"
For external libraries, Exasol administrators should mark the checkbox "Disable Security Manager" if they are trusting to the vendor where they have downloaded the JDBC driver from.
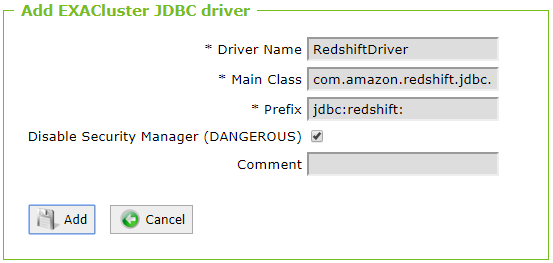
After you are completed with the page entries for JDBC driver, click Add button.
The Exasol administrator will be redirected to the JDBC Drivers tab. Please note that in Files column for RedshiftDriver "No files uploaded" message is displayed.

Now it is time to upload the JDBC driver we have downloaded for Amazon Redshift database in the first step.
To upload the .jar driver file, make sure that the option box next to the Amazon Redshift driver is selected.
Then click Choose File button and navigate to the file folder where the driver file is saved.
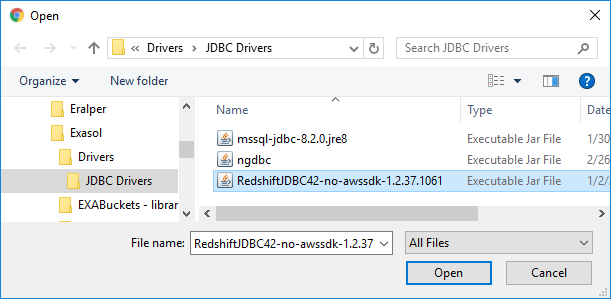
Select the file and press Open button. You will see that the name of the driver file is displayed between Browse File and Upload buttons.
![]()
Click Upload button to finish our task on EXAoperation Web UI administration tool.

SQL developers can now use the JDBC driver to build direct JDBC connection between two databases Exasol and Redshift.
On a SQL development client tool, preferably DbVisualizer Pro especially for Exasol, execute following SQL script code to create JDBC connection to Amazon Redshift database and query data
The URL used for connection object to Amazon Redshift database is in the format: jdbc:redshift://endpoint:port/database
You can use the IP address of the lead node instead of the DNS name.
CREATE OR REPLACE CONNECTION redshift_connection

 TO 'jdbc:redshift://cluster1.dwyndp26ofq37.eu-central-1.redshift.amazonaws.com:5439/kodyaz'

 USER 'redshiftdbuser'

 IDENTIFIED BY 'password';


SELECT *

FROM (

 IMPORT FROM JDBC AT redshift_connection STATEMENT '

  SELECT count(*) as cnt FROM ofsbo.workskilltocategory;

');
Here is how the SQL Select queries on Exasol can be used with Import command to read data from remote data sources including Amazon Redshift database tables.
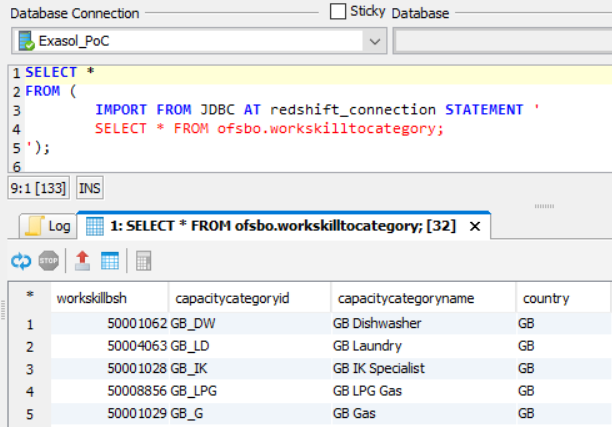
I hope I could explain the EXAoperation screen tasks to upload a JDBC driver on an Exasol cluster and how to build SQL queries syntactically to read data from external Amazon Redshift database tables successfully.
