How to Connect Denodo using DbVisualizer Database Management Tool
In this data virtualization tutorial for Denodo users, I want to introduce an alternative client tool DbVisualizer which SQL developers can use to connect Denodo Platform to execute their SQL queries on Denodo database. I want to share how to define JDBC driver for Denodo data virtualization platform connections on DbVisualizer tool.
First of all, launch DbVisualizer database management tool.
If you want to download and install DbVisualizer, you can refer to how-to article at download and install DbVisualizer Database Management tool for SQL developers.
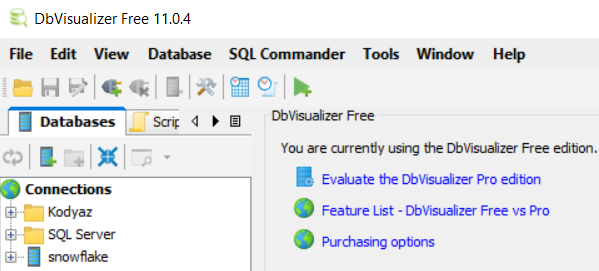
If you are going to create a database connection for a Denodo Platform for the first time, it is possible that the Denodo driver is not defined yet.
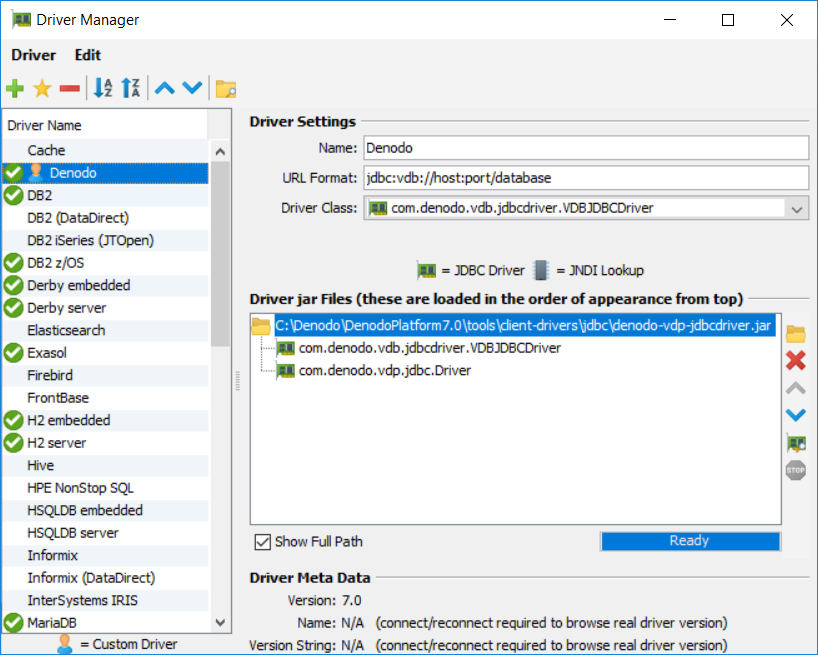
We can define the JDBC database driver for Denodo using the Driver Manager as illustrated below
On DbVisualizer's main menu, follow menu options: Tools > Driver Manager…
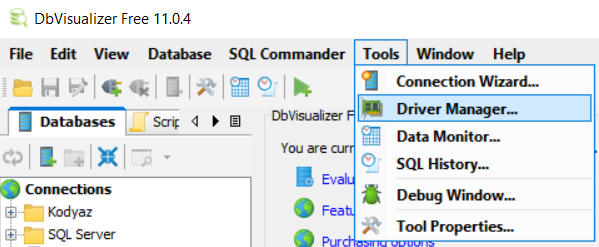
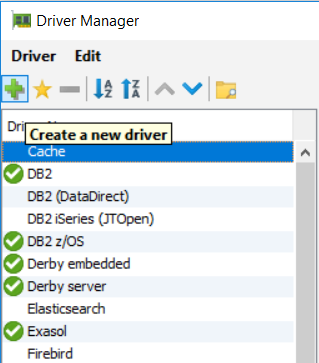
If this is the first time you are connecting to a Denodo Platform, you will not see an entry for a Denodo driver in the list.
Click on the icon to "create a new driver" for Denodo plarform connections
A new driver entry is created with empty configuration as follows
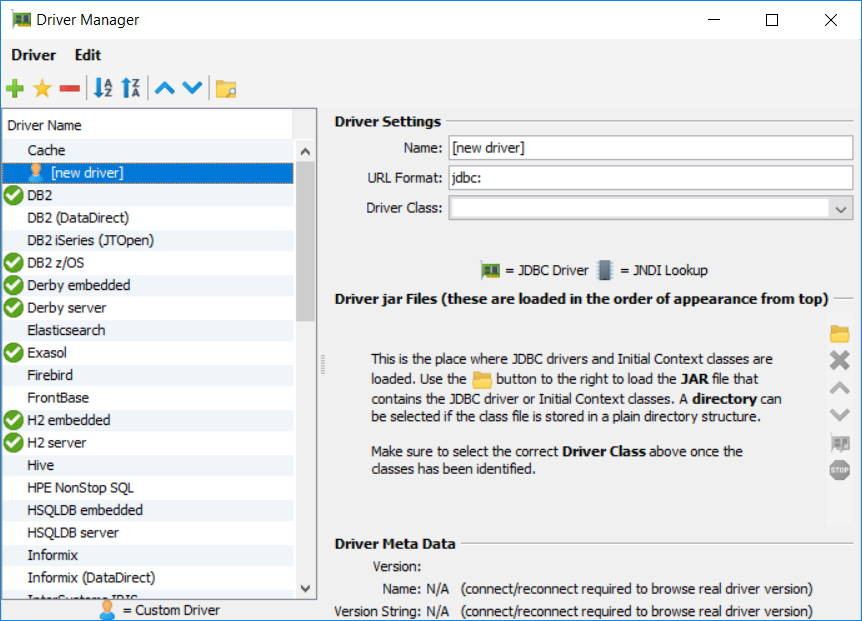
Type a descriptive name to your new driver
For example, you can use "Denodo" for driver name
URL Format for Denodo driver is as follows:
jdbc:vdb://host:port/database
For Driver Class property, first we have to point to the Denodo JDBC driver file using the "folder" icon
Click on the folder icon and navigate to the \tools\client-drivers\jdbc folder under Denodo Platform home path
For example, in my installation I find the denodo-vdp-jdbcdriver.jar JDBC .jar file under path:
C:\Denodo\DenodoPlatform7.0\tools\client-drivers\jdbc

After you open the file folder and select the denodo-vdp-jdbcdriver.jar JDBC driver file and click "Open", you will return back to Driver Settings page where the Driver class is automatically populated and there is a green check mark next to "Denodo" driver name on the left drivers list box.
Close the Driver Manager by clicking on the "x" close icon on the top-right of the dialog screen.
After the Denodo driver is defined, we can now create database connection to Denodo platform as shown in following steps.
On initial screen of DbVisualizer, on Databases window, click on "Create new database connection" icon
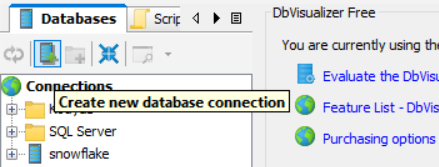
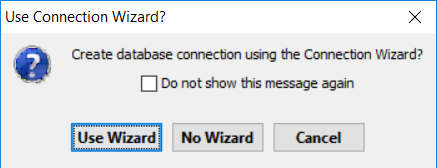
Choose the "Use Wizard" option to make the database connection process easier
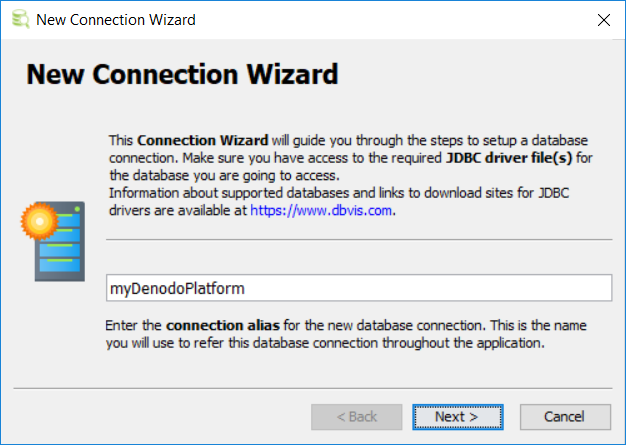
On the first page of the new connection wizard, provide a descriptive name or a connection alias to the Denodo database connection
Choose the Denodo driver we have defined in previous section using the dropdown list.
Remember we have named the Denodo database driver as "Denodo"
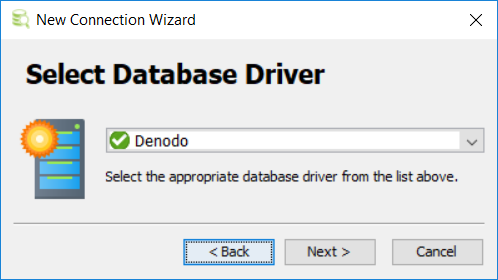
In next wizard screen, we need to provide the details for the Denodo database connection
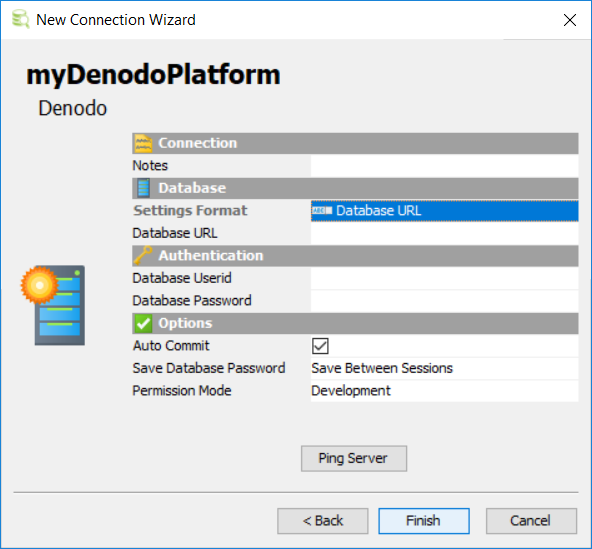
The database URL format was defined as below in previous section
jdbc:vdb://host:port/database
Database URL for my target Denodo Platform is as follows according to database URL format
jdbc:vdb://10.165.40.33:9999/poc
Then provide a valid Denodo Platform credential details using database userid and database password for that user
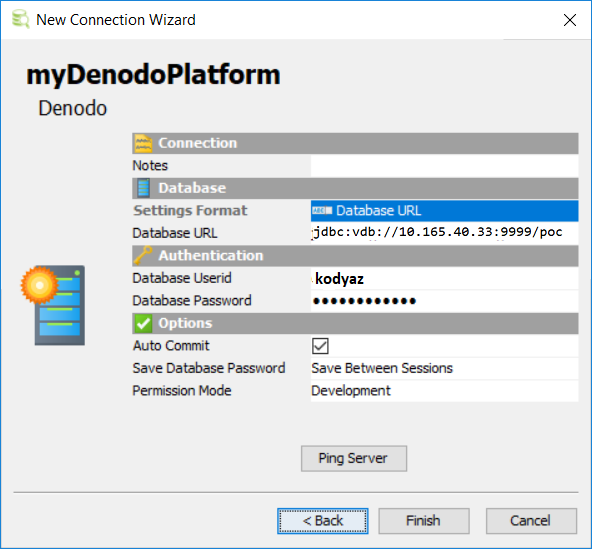
Click Finish
On the Databases window, the new Denodo database connection will be listed and if the connection is successfully established you will see the green checkbox next to it.
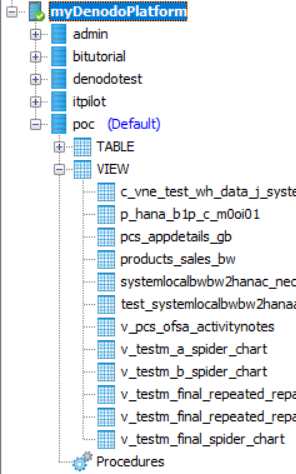
Below, the default database identified in the Database URL can be seen (in this case poc database) among other databases created within Denodo Platform connected.
The database connection properties screen shows that the Virtual DataPort version is 7.0 and the JDBC driver class used is com.denodo.vdp.jdbc.Driver in Connection Messages area
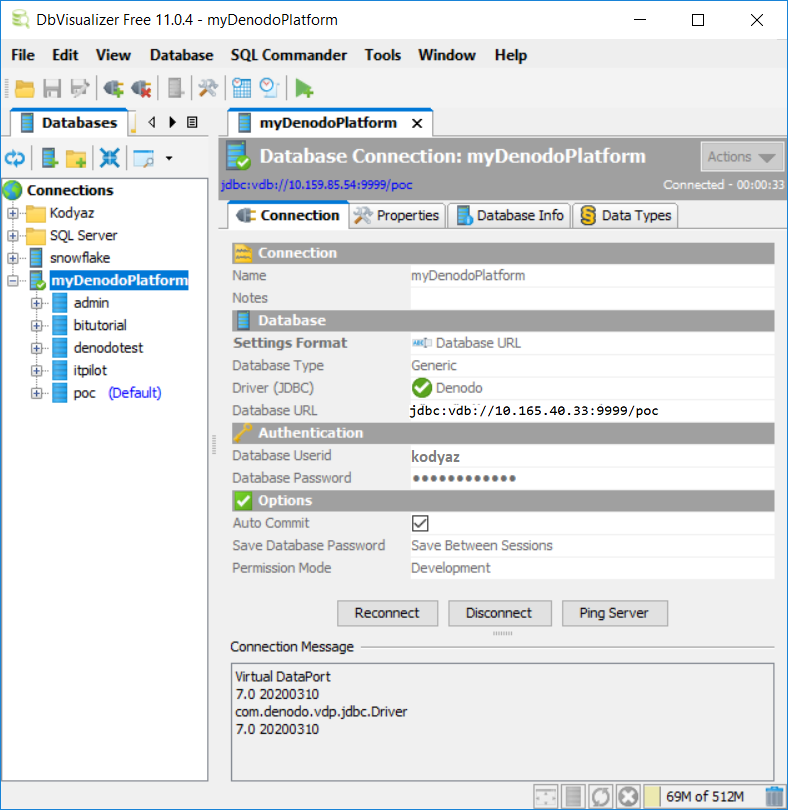
Under each Denodo database, if you drill down you will see Table and View nodes.
Underlying datasource base views are listed under the "TABLW" node and business views are listed under the "VIEW" node in alphabetical order.
I hope this Denodo and DbVisualizer tutorial is helpful for you to establish the database connection from DbVisualizer database management software to Denodo Data Platform or data virtualization platform databases.
