Connect Amazon Redshift Database from Denodo Data Virtualization Platform
This Denodo guide shows how a JDBC database connection can be created to connect Amazon Redshift from Denodo Virtual DataPort Administrator Tool. Before you create database connection to Redshift database using JDBC connection from Denodo, it is better to follow the best practices provided by Denodo for creating a virtual database and establishing a folder structure for your projects. The first 2 sections are more about following these best practices like to create virtual database and create data sources folder for database connections that you will create for your project. Last section in the tutorial, shows the step to create a JDBC database connection to Amazon Redshift database on Denodo Platform.
Create New Virtual Database on Denodo Platform
After the data virtualization architect or developer launched Denodo Virtual DataPort Tool and log on to the application, you will see the Server Explorer window on the left side with previously created data sources and virtual databases. If you are new with Denodo Virtual DataPort and if you are using the Virtual DataPort for the first time, the view of the tool will be similar as below.
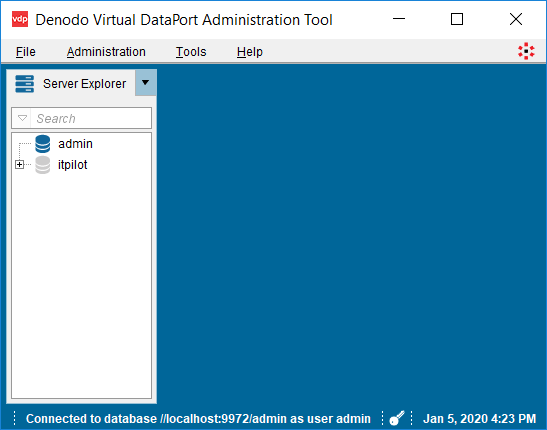
The first step will be creating a new virtual database.
Please follow menu options "Administration > Database management"
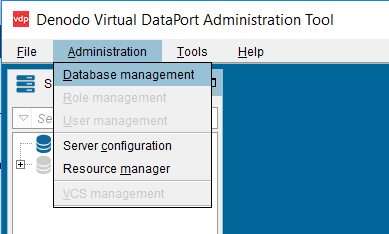
When the Database Management screen is displayed, you will see the existing virtual databases.
One for admin database and another for itpilot database. These are the default databases shipped with every Denodo Platform installation.
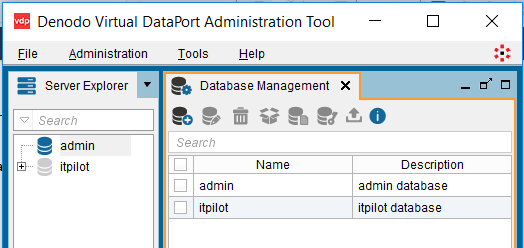
Now the data virtualization architect is ready to define a new virtual database for the project he is working on at the moment. For exampls, if the architect or virtualization developer is building a data lake project, he or she can create a new virtual database named "Data Lake"
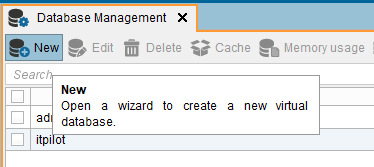
Click on New icon to launch the wizard to create a new virtual database
Provide the name of the virtual database and a short description about the virtual database. For example, a "data lake" is the sink where all data sources including structured and unstructured can be joined, so the naem of the virtual database and its purpose is entered briefly.
Before you press OK to complete the creation of the new virtual database, just a reminder. The name should not contain a space character but you can use "_" for example. And all capital letters are changed into lower case letters automatically when the definition is saved.
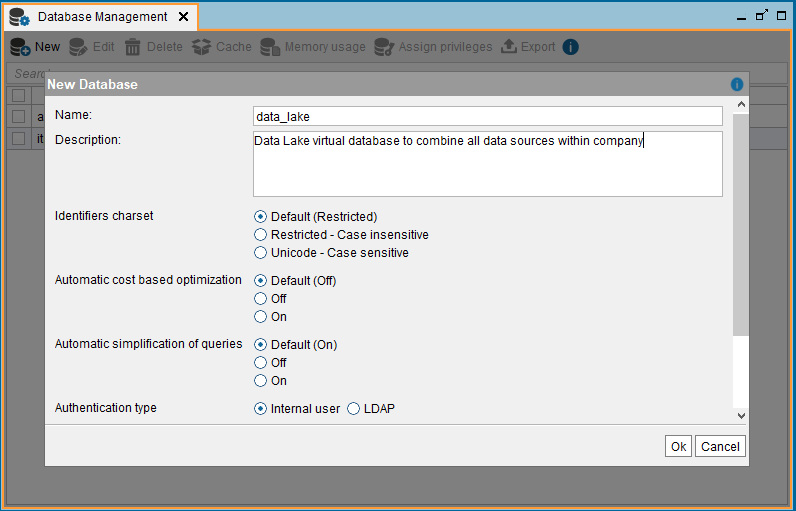
Press OK to save and create the new virtual database in the Denodo Virtual DataPort Tool.
Now in Server Explorer window, you wil be able to see the new database too.
Why is the virtual database is important. One reason is that it is possible to define one caching database for the virtual database sources. If you plan to cache data in different target data warehouse or database applications, then you can split the virtual database and its sources into two or more different virtual databases.
Create Data Sources Folder for Database Connections
Now on Server Explorer window highlight the virtual database "data_lake". Then right click on the database name on on context menu choose "New > Folder" option
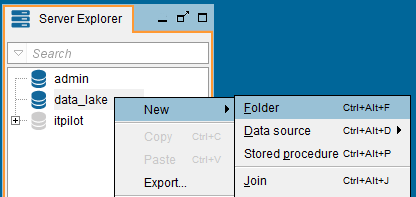
Create a new folder named "Data Source"
![]()
Create JDBC Connection to Amazon Redshift from Denodo Virtual DataPort Tool
Right click on "Data Source" folder and follow menu options "New > Data source > JDBC"
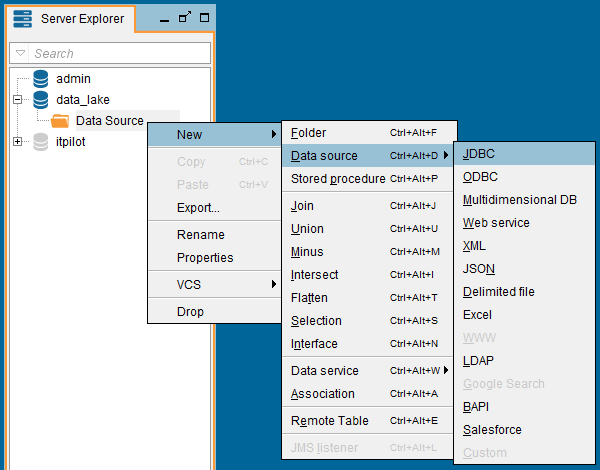
Here is the default JDBC creation screen for Generic database adapter for data virtualization developers.
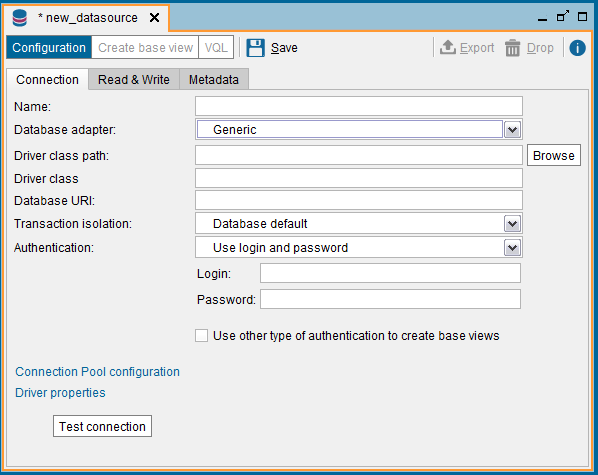
Since we are planning to connect to Amazon Redshift database using JDBC, we can choose "Amazon Redshift" from "Database adapter" combobox. Changing the database adapter changes the default template values displayed on the screen. This makes the task of creating a new data source easier for the data virtualization architects and developers.
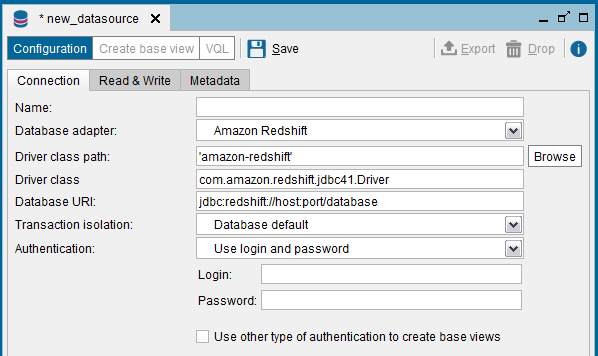
Replace the template parameters with your data source specific values like name, database URI, login and password.
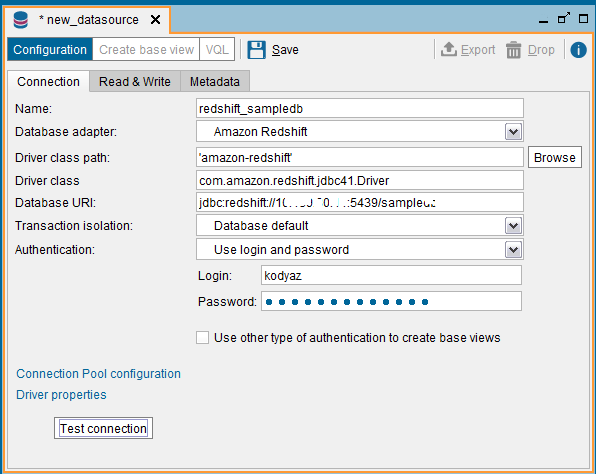
Click on "Test connection" button to see if the connection paramter values are correctly provided and a valid successfull connection can be established from Denodo Virtual DataPort Server and Amazon Redshift database.
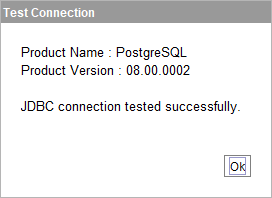
If you are able to see the "JDBC connection tested successfully" message, then click OK to close the message box.
Press Save button on data source connection configuration screen.
Now within the "Data Sources" folder under the virtual database "data_lake" that we have previously created, we have our JDBC connection to Amazon Redshift database.
If you plan to add connections to different Redshift databases, you have to define separate connections as new data sources.
