Connect Amazon Redshift from SQL Workbench using JDBC Driver
SQL Workbench tool is one of the SQL editors for Amazon Redshift database cluster for managing data warehouse on cloud and Redshift connection can be created using JDBC driver. Although it is well documented on AWS documents, since I had a few issues troubled me during downloading and installing SQL Workbench and connecting to Amazon Redshift database using JDBC driver, I thought to take my notes in this tutorial.
Download JDBC Driver for Amazon Redshift
First things first, let's start by downloading the JDBC driver for Amazon Redshift. You can refer to AWS documentation on this.

I have downloaded the JDBC 4.2 compatible JDBC driver using this link to connect to Amazon Redshift data cluster.
After I download the Amazon Redshift JDBC driver, I copied the .jar file under a folder created for JDBC driver versions for connecting to Redshift clusters.

Please take note that the class name com.amazon.redshift.jdbc42.Driver is specified for this driver. We will use this information within SQL Workbench client tool to define driver for Amazon Redshift.
By default the driver class name is com.amazon.redshift.jdbc.Driver. It seems to work with any driver versions.
Download SQL Workbench Tool to Connect to Amazon Redshift Database
To download SQL Workbench Tool please visit SQL Workbench.
Developers can find additional information about the tool also in the referred web site.
For this Amazon Redshift tutorial, I download SQL Workbench/J Build 125 at downloads page.
You can choose to download "Generic package for all systems using all optional libraries" option. Its size is only about 26 MB.
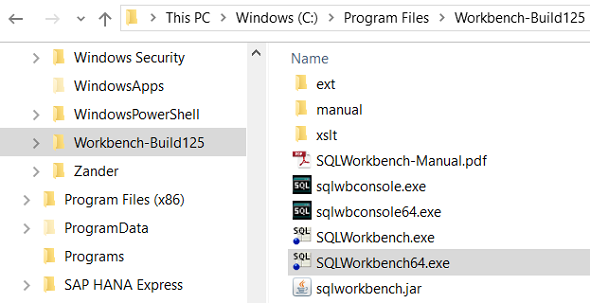
After download, extract the .zip file into a target folder for example "C:\Program Files\Workbench-Build125"
According to your processor architecture you can execute SQL Workbench tool either using SQLWorkbench64.exe or SQLWorkbench.exe
But please in mind, if you have 64-bit processor and operating system and try to use SQLWorkbench.exe instead of SQLWorkbench64.exe, you may experience absurd error.
For example, there is a "browse" icon which launches Windows Explorer style file selection dialog for pointing to the JDBC driver which fails to work with 32-bit SQLWorkbench.exe but successfully works with SQLWorkbench64.exe
Manage Drivers to Define JDBC Driver for Redshift
Launch SQL Workbench using SQLWorkbench64.exe
"Select Connection Profile" dialog screen can ask you to create the profile for database connection that you want to work with.
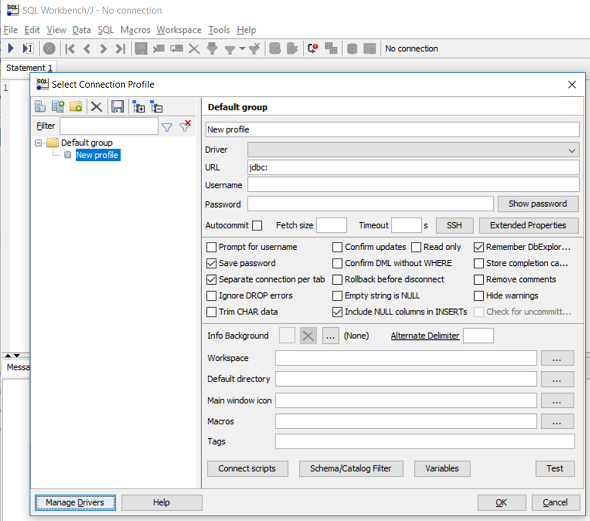
For initial configuration, we will first define the Amazon Redshift JDBC driver to the SQL Workbench tool.
Click Manage Drivers button at the bottom of the screen.
Or on main menu, follow options "File > Manage Drivers..."
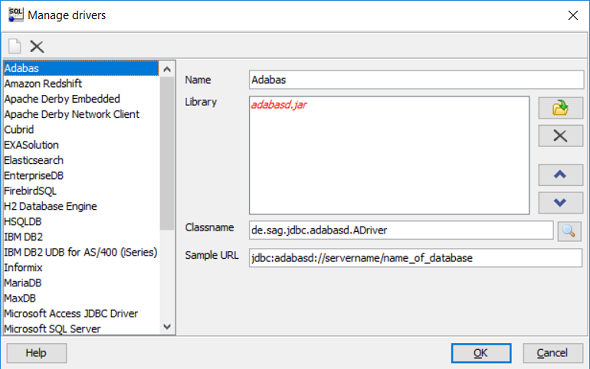
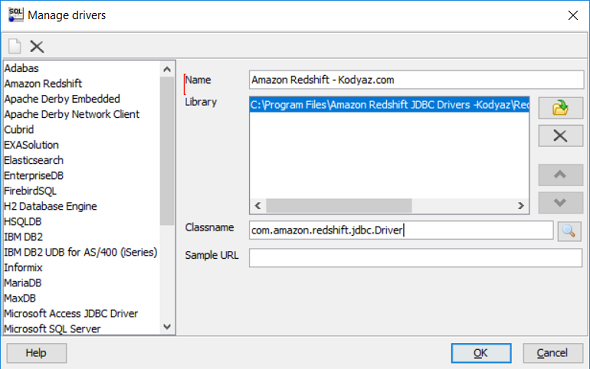
Press "Create new entry" icon at the top of the screen of Manage Drivers
Fill the input text areas as seen below.
Using file selection icon, point to the .jar file you have download as JDBC Driver for Amazon Redshift in previous steps.
The class name field will be populated as com.amazon.redshift.jdbc.Driver which is the default class name. You can also accept this class name for JDBC driver.
Then press OK button.
Create Profile to Connect Amazon Redshift Database
After JDBC driver is defined, we can create a new profile to connect to specific Amazon Redshift database.
On main menu, follow menu options "File > Connect window"
On "New Profile" screen we will define a new configuration to connect to your target Amazon Redshift cluster and database.
Give a descriptive name to your database connection profile.
In Driver combobox, choose the driver entry you have created in previous step (Amazon Redshift -Kodyaz.com entry in this tutorial).
In URL entry, type the connection URL which is in a similar format as "jdbc:redshift://10.159.80.11:5439/kodyaz"
In username and password textboxes enter the credentials of the database user you have to connect to Amazon Redshift cluster database.
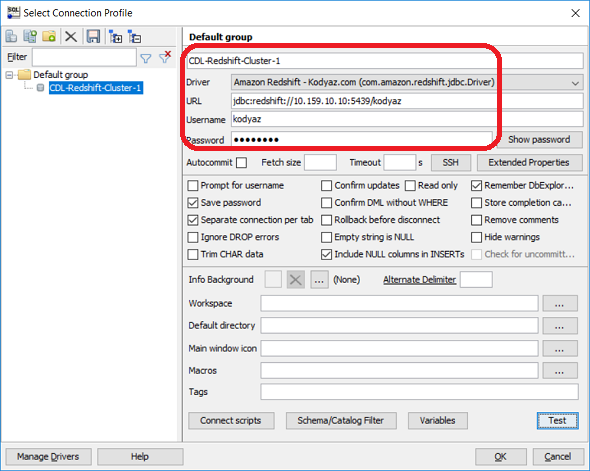
Press Test button on screen to see if your database connection works successfully. If so press OK to save your Amazon Redshift connection profile.
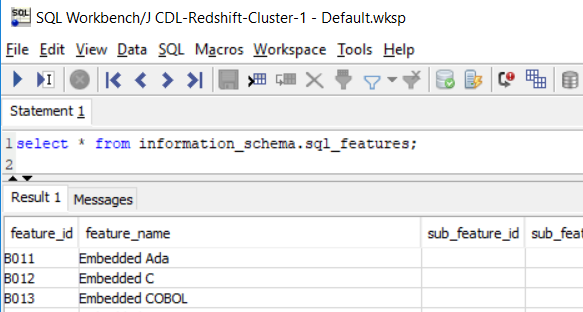
You can execute following SQL SELECT command too to see if database connection is successfully working on SQL Workbench
select * from information_schema.sql_features;
