AWS System Manager Service Software Inventory Setup
AWS System Manager service provides Software inventory tool for cloud users to collect detailed information about the software installed on their EC2 instances and servers. Not only installed software applications but in addition to those the operating system patches, updates, services, Windows roles, Windows registry entries, files with specified extensions and under a certain folder, etc. A rich detailed information can be easily collected by this Amazon software inventory service on demand and with a scheduled execution.
Log in to AWS Management Console and launch AWS System Manager service.
AWS cloud users can find the System Manager service under the Management & Governance service group.
![]()
On the left side of the System Manager menu cloud infrastructure users will see Managed Instances, Inventory and State Manager sub services under Instances & Nodes service groups.
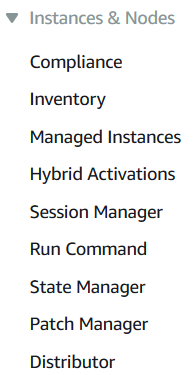
First of all, click on Managed Instances node.
The first prerequisite is the EC2 instance should be a managed instance so that using AWS Software Inventory, we can collect detailed inventory information about all the software, OS updates and patches installed on the EC2 server.
Setup AWS System Manager Inventory
If the servers that you are interested to collect software inventory about is among the managed instances, you can start building an inventory collecting job.
On Managed Instances screen, you will see Configure Inventory button when clicked Setup Inventory action will be displayed.
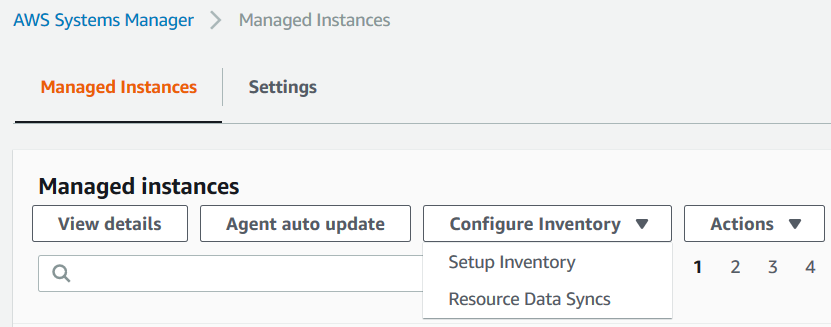
Same action is accessible if you click on Inventory from the left side menu on Systems Manager Dashboard.

On Setup Inventory screen, type a descriptive name to this Inventory scan task.
I plan to prepare an inventory report for a single EC2 server which is running a Tableau server. So I named it as "Tableau-Inventory-Association".
Of course it is possible to create the inventory for a group of managed instances instead of a single server.
We will select the EC2 instances that will be scanned as part of this inventory by using Targets configuration.
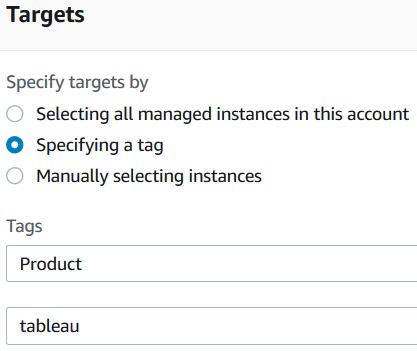
You have the option to prepare the inventory list for all managed instances in your AWS account, or filter EC2 servers based on a tag and its value, or manually select the EC2 instances.
I preferred to specify a tag named Product and filter EC2 instances with Product tag value equals to "tableau".
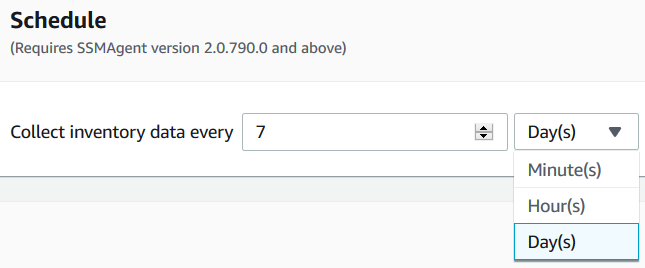
By defining a Schedule, it is possible to execute inventory scans periodically for example once every week, etc.
Using Parameters you can define the details that you want in your Software Inventory service that will be provided by AWS Systems Manager.
You can collect data about:
Installed applications,
AWS components like amazon-ssm-agent,
Network configuration,
Windows Updates,
Instance detailed information like CPU model, speed, number of cores, etc
Service configurations for Windows OS running EC2 instance,
Windows role configurations,
Custom inventory,
Billing information for application licenses,
Files information within specified path and file extension,
Windows Registry
Following screenshot shows a very simple usage for Files parameter and Windows Registry parameter
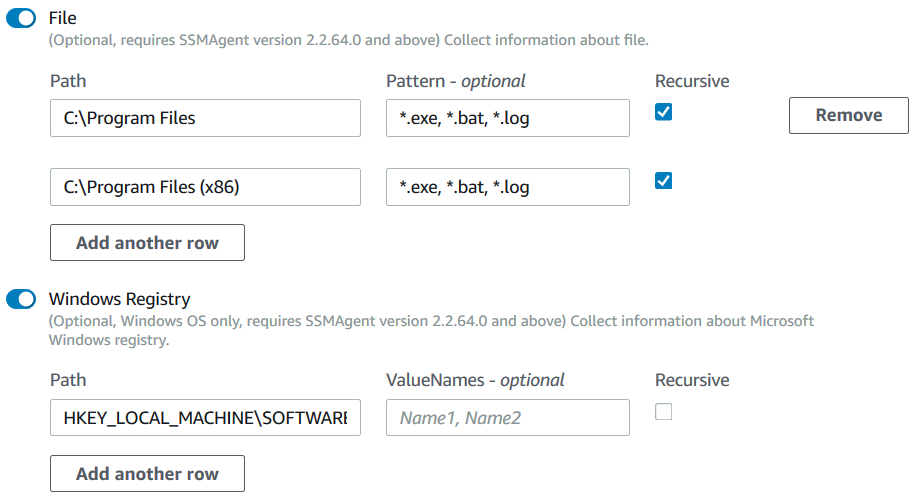
Using Advanced section, it is possible to store the inventory scan results into an Amazon S3 bucket. For this AWS tutorial, I will not enable storing Inventory outcome into an Amazon S3 bucket but only display inventory results using AWS Management Console.
![]()
If you now switch to State Manager from the left menu of Systems Manager, you will see the recent created Inventory scan as a new association like below
In Status column, you will see the "Pending" state as the initial state for your new inventory association.
Associations actually map to inventory definitions.

When the association id status is green and success message is displayed, the software inventory is collected.
![]()
AWS users now can access and display inventory details.
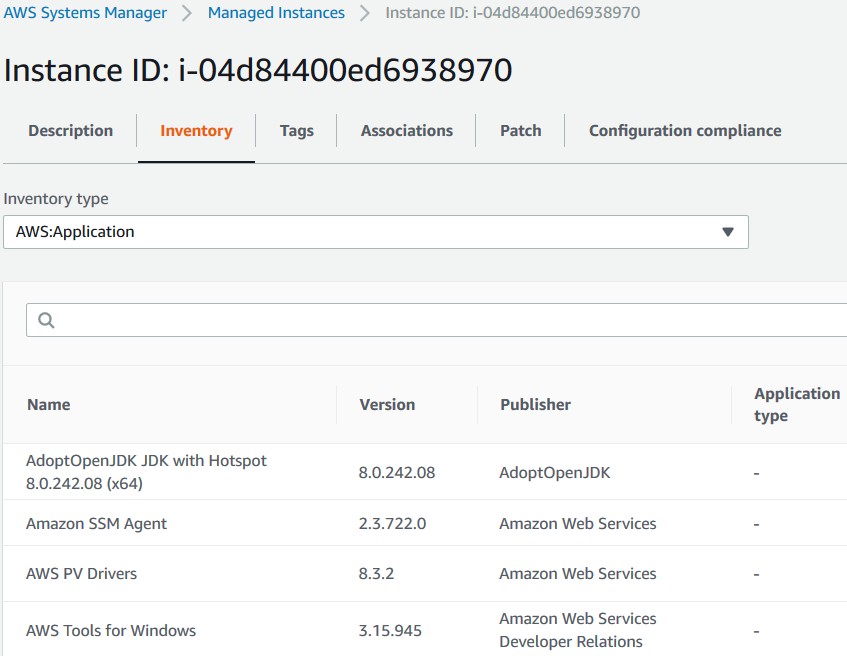
On Managed Instance page, using Inventory tab you can display details as seen in below by choosing one of inventory types.
On Inventory tab, by default the list of installed applications will be displayed similar to following.
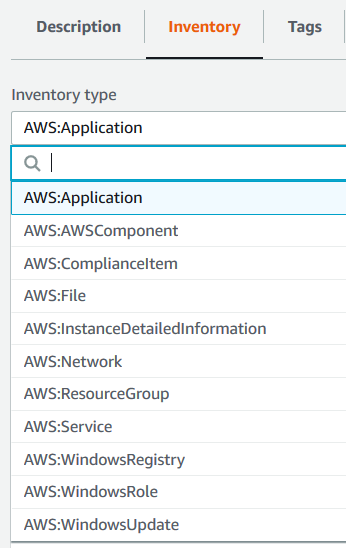
Here are the other inventory type options, the AWS users can select
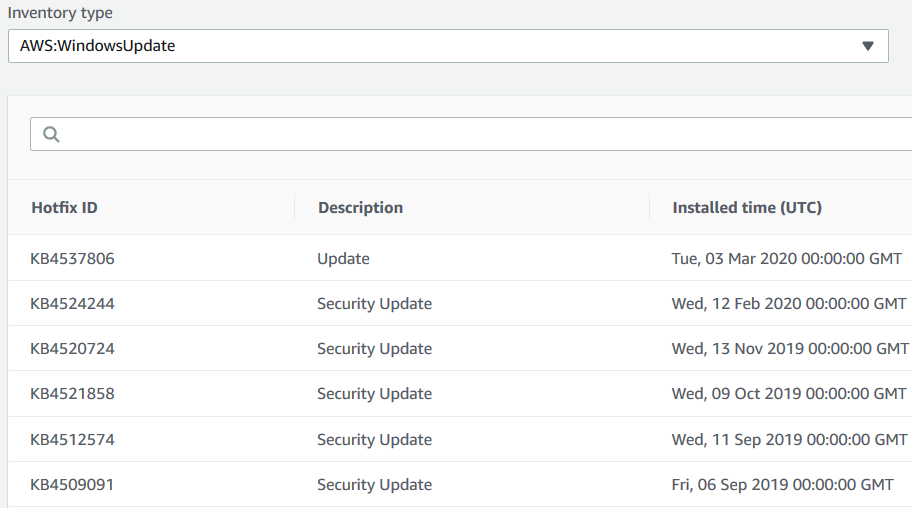
For listing the Windows Updates of the managed EC2 insance, you can switch to AWS:WindowsUpdate from the select option list.
Troubleshoot Inventory Association Execution Errors
If you experience an error during execution of the association, the status will turn to Failed
![]()
For troubleshooting the association error, on State Manager screen where Associations are listed, click on the Association id link where the status of an assosication is Failed
On the screen where Association details are displayed, switch to Execution history tab. Under Execution history tab, a list of Association executions is displayed. Click on the Execution Id with Failed status.
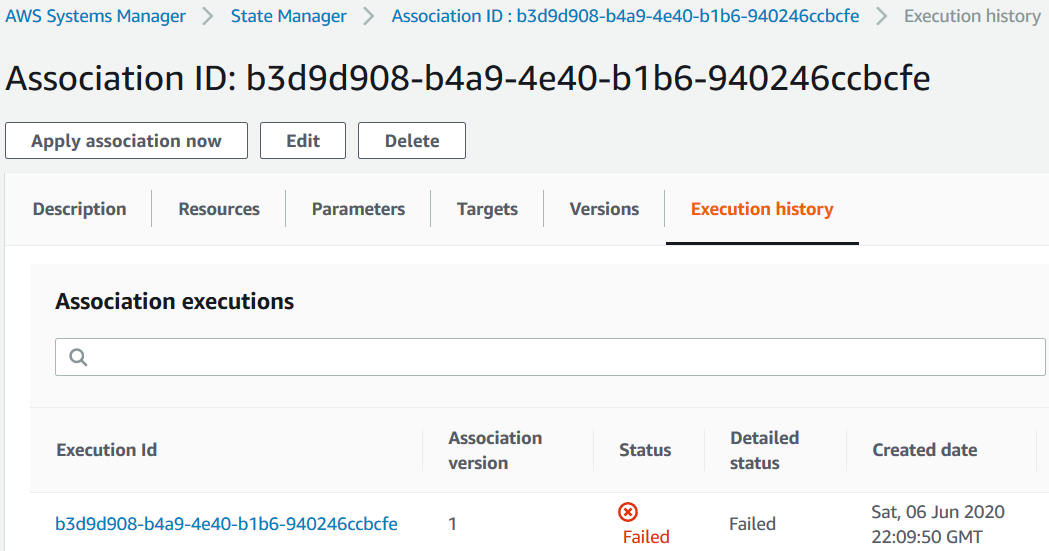
Click on Execution Id which will lead us to Association execution targets list. This list will contain a row for each EC2 instance targeted by the inventory.
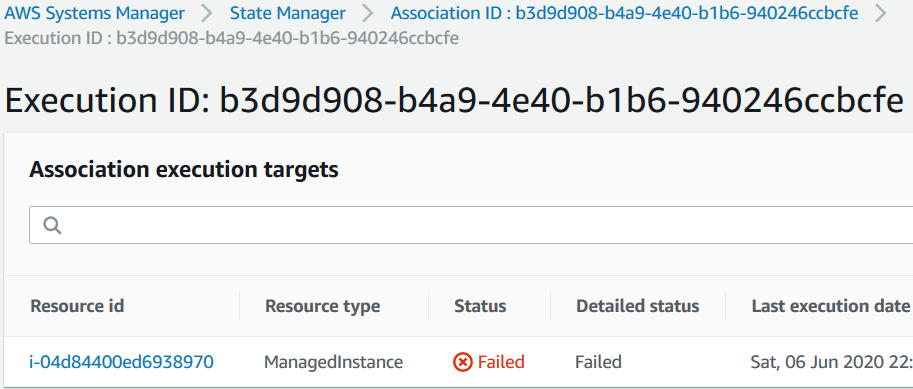
Click on Resource id link button. This link will lead you to the instance details page under AWS Systems Manager Managed Instances
Switch to the Associations tab from the default Description tab.

Select the association with failed status using select options and click on View Output button. The displayed message will contain the error message that will help you understand the root cause of the error.

Execution Summary: The operation collectSoftwareInventoryItems failed because Encountered error while executing AWS:WindowsRegistry. Error - Exceeded register value count limit.
